App Campaigns
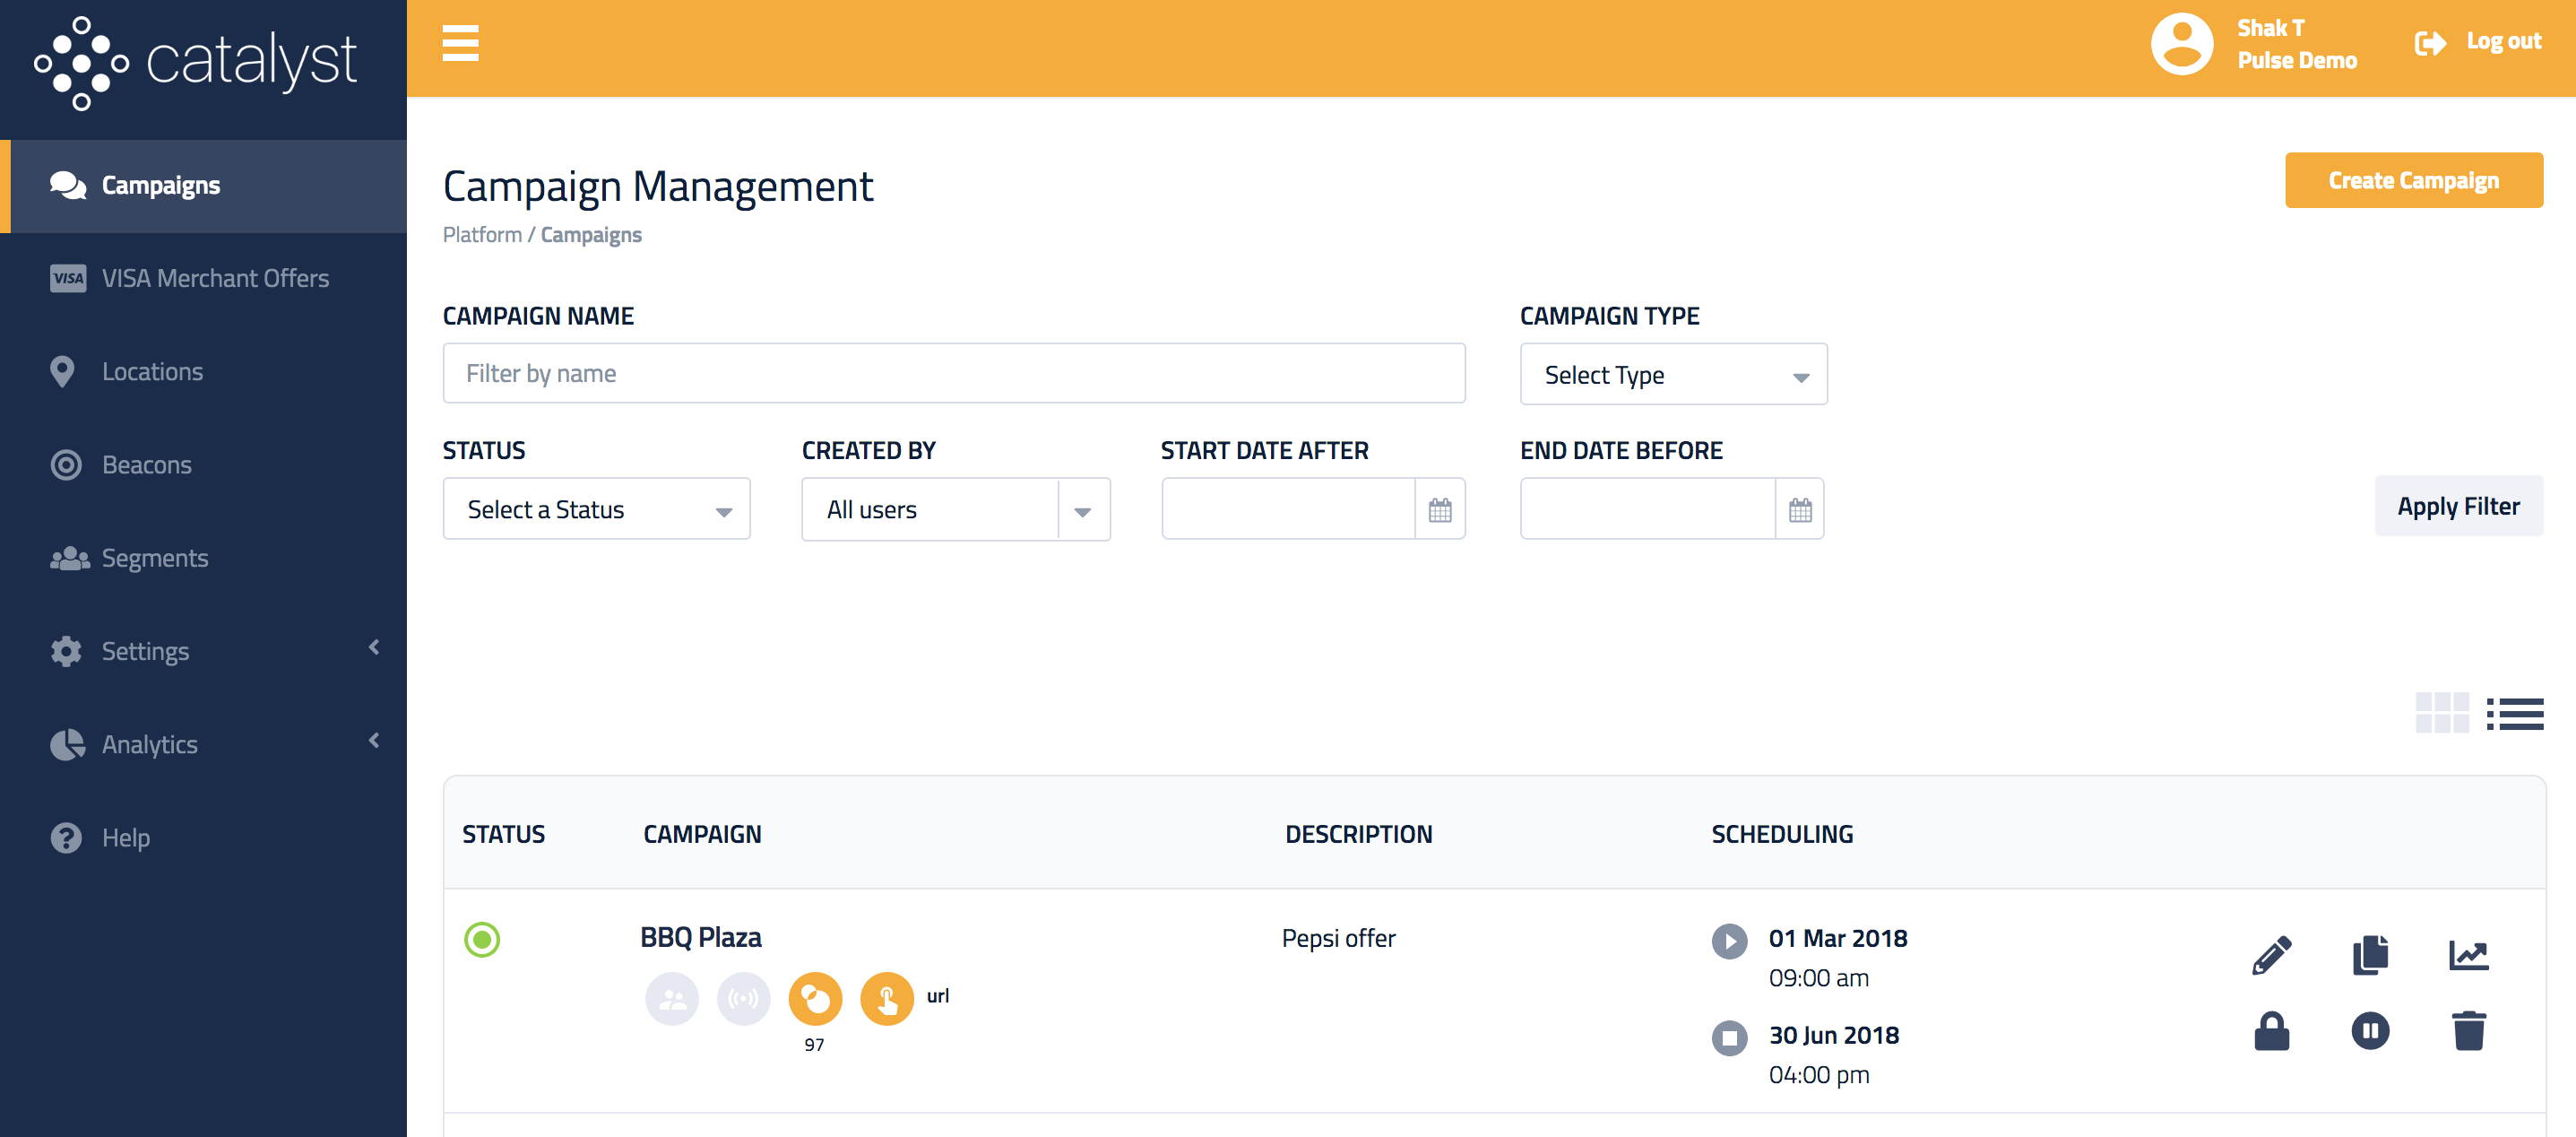
Use the Campaign Management page to create and manage geo-personalized Campaigns. Click the Create Campaign button in the top-right corner to set up a new Campaign.
| Operation | Description |
|---|---|
 |
Starts the Campaign wizard to edit the Campaign |
 |
Duplicates an existing Campaign. This is a handy tool for quickly starting new campaigns based on previous configurations |
 |
Displays analytics for the current Campaign |
 |
Locks the Campaign to prevent accidental modification |
 |
Pauses the Campaign, preventing it from being delivered |
 |
Deletes the Campaign |
Campaign type
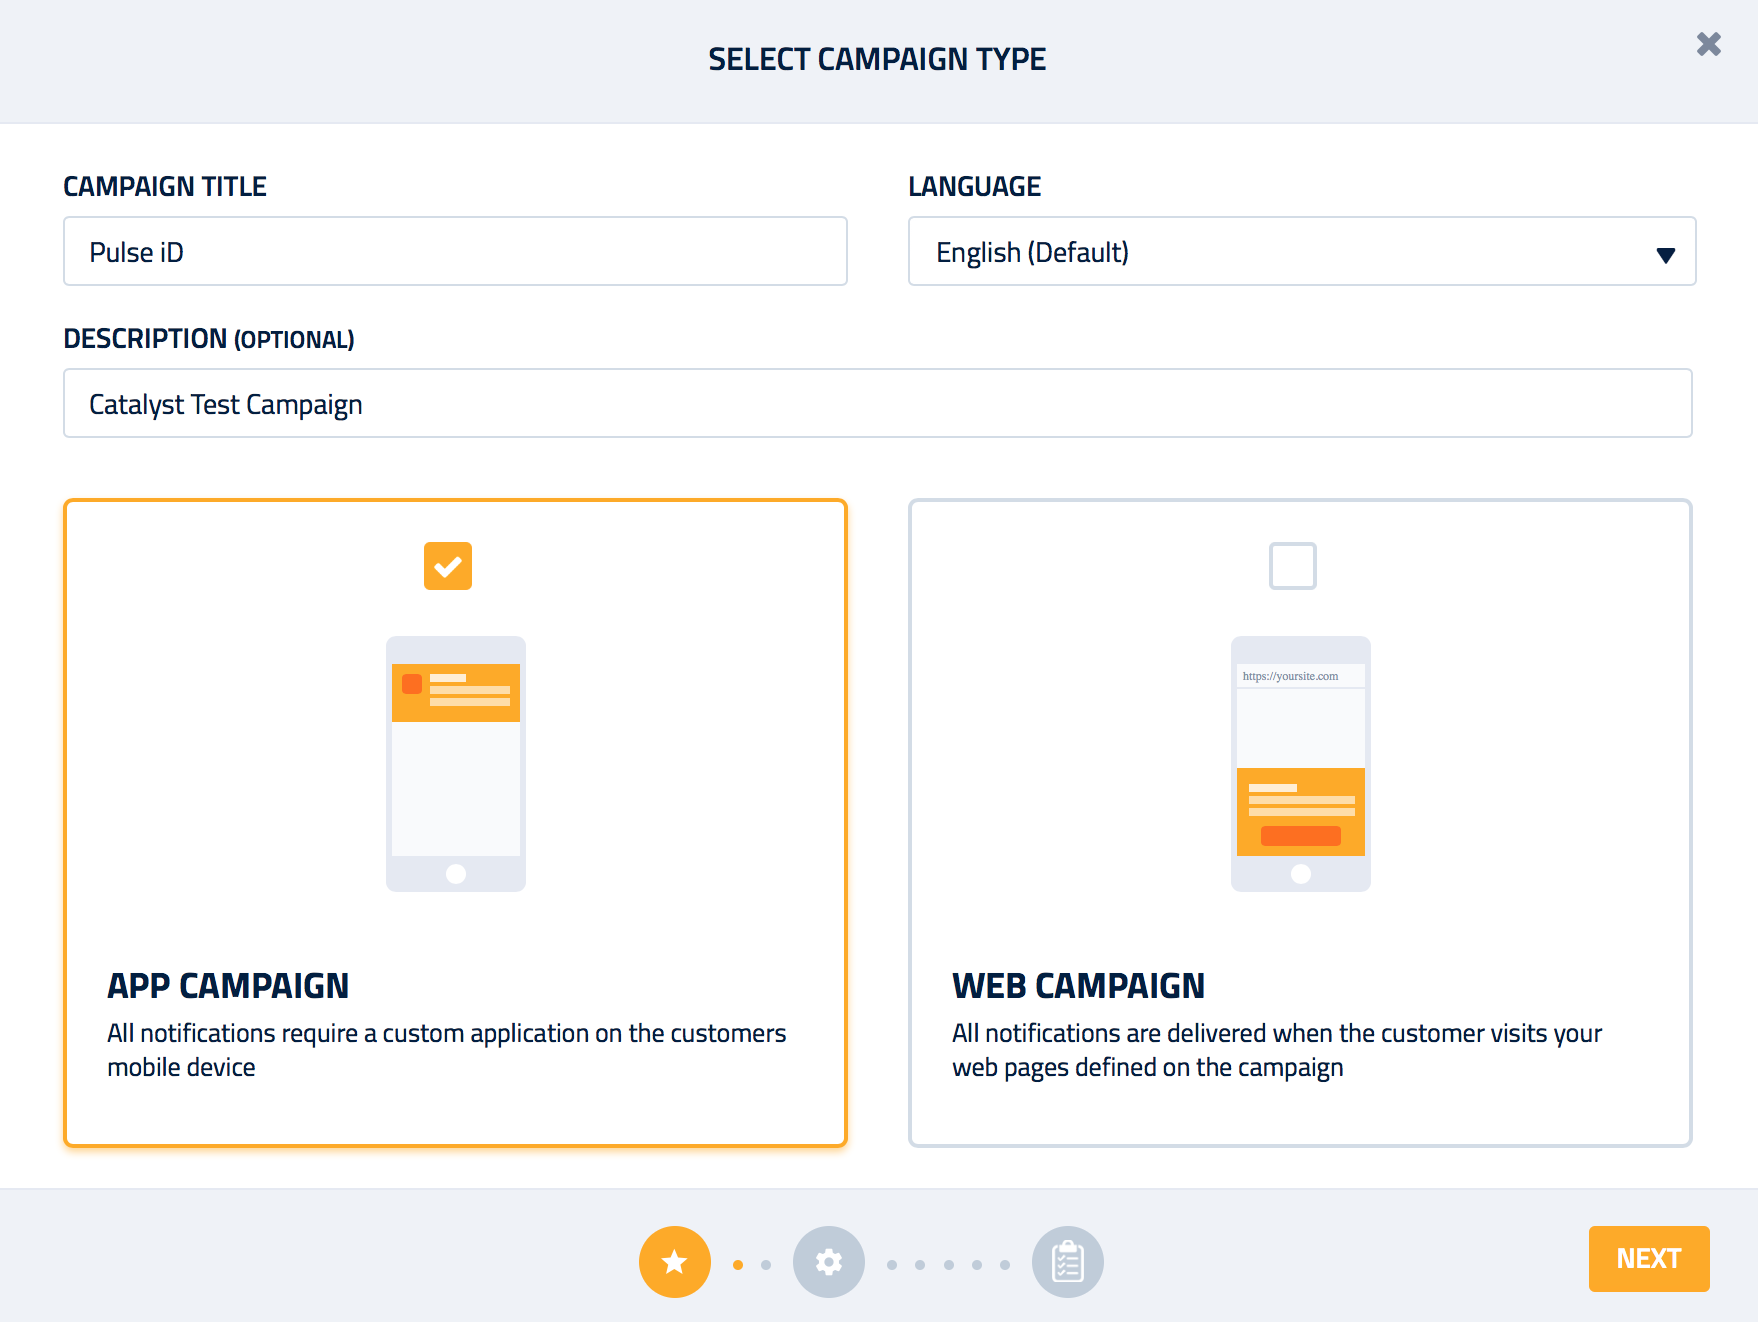
Enter basic information to identify your Campaign and select App Campaign type to proceed.
Language preference
English is the default Language. However, if another language is chosen then the native language campaign will be given priority when a user device has the same preferred language.
Campaign targeting
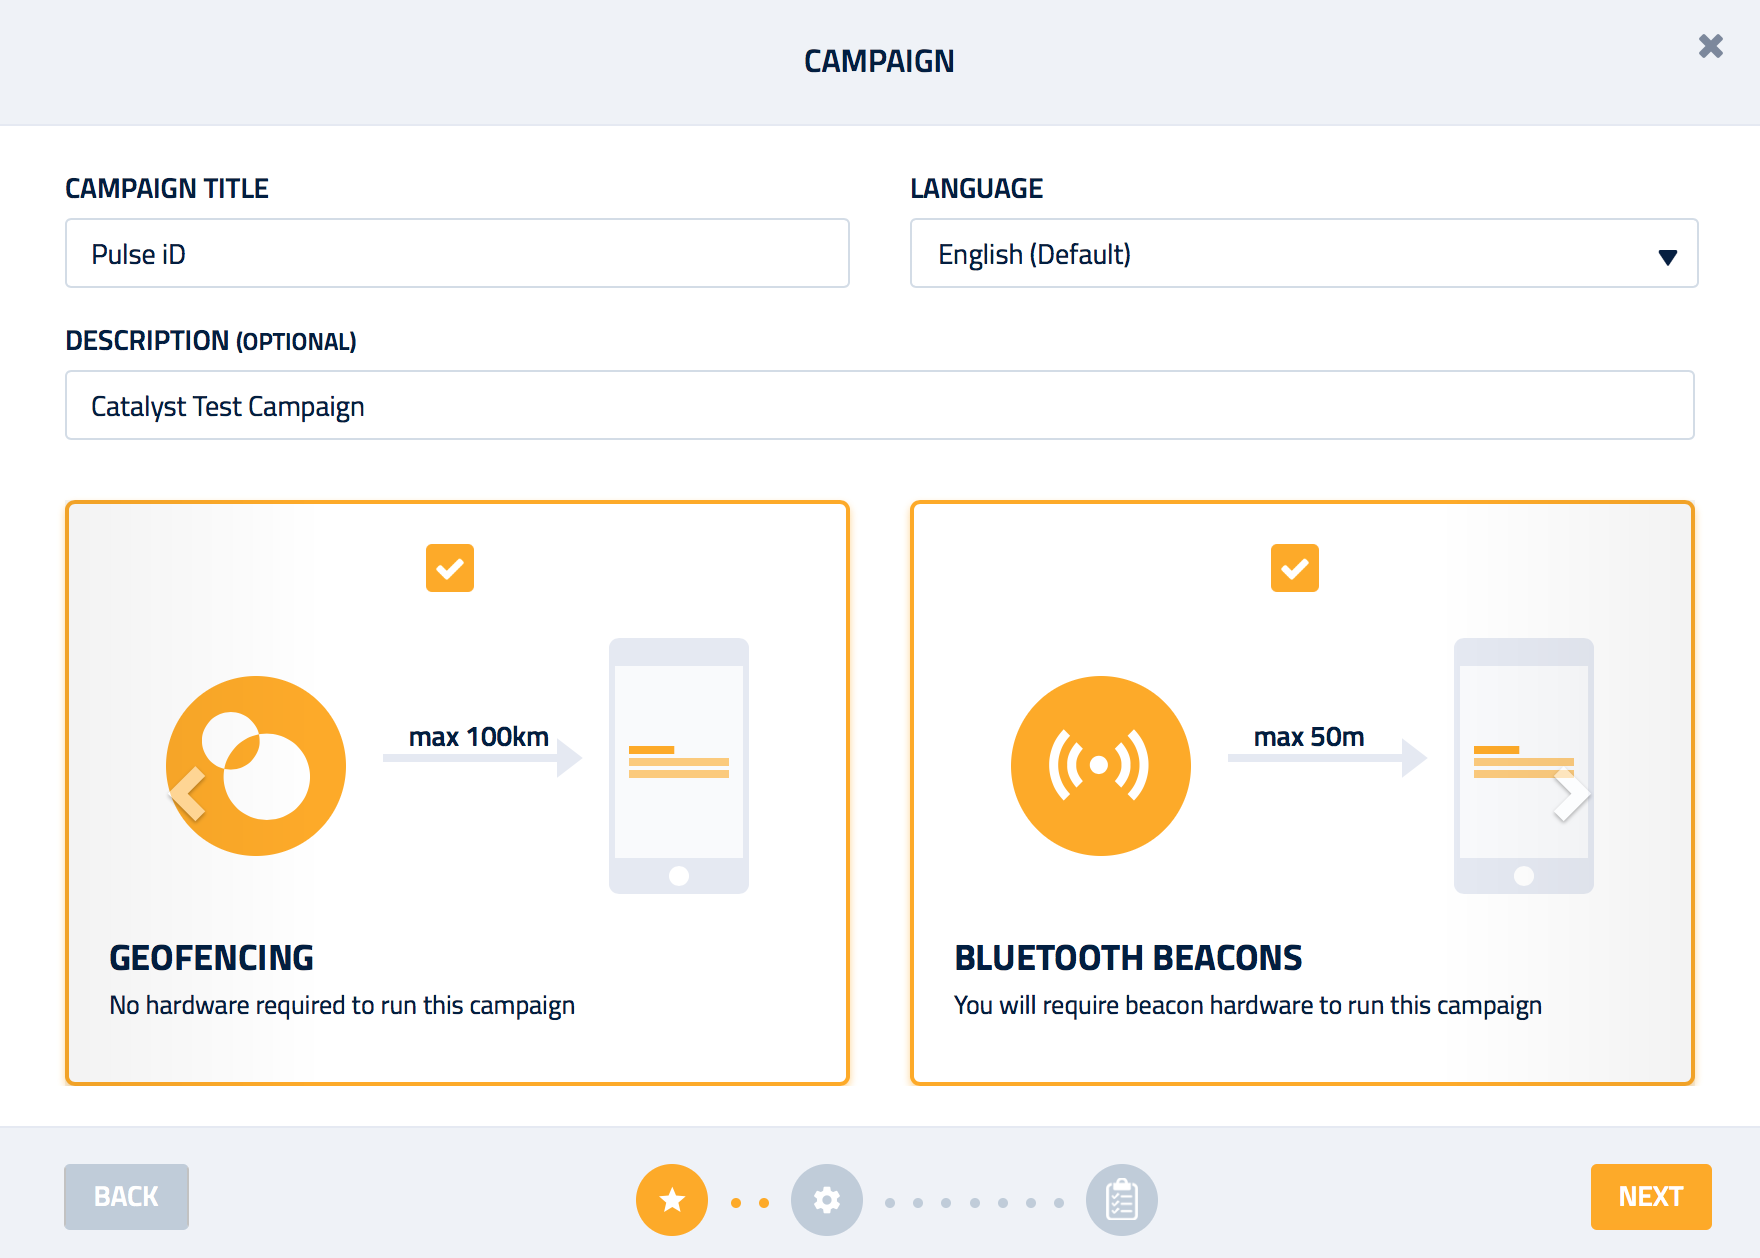
Next, select the location targeting technologies you wish to use in the Campaign.
-
Beacons are ideal for engaging user inside stores and buildings where GPS location accuracy is limited. Beacons can provide up to 5 meters accuracy
-
Geofences are invisible fences drawn around physical locations and are ideal for engaging users within 150 meters of a location
-
Beacons and Geofences can be used independently or together depending on the use case
Time-axis targeting
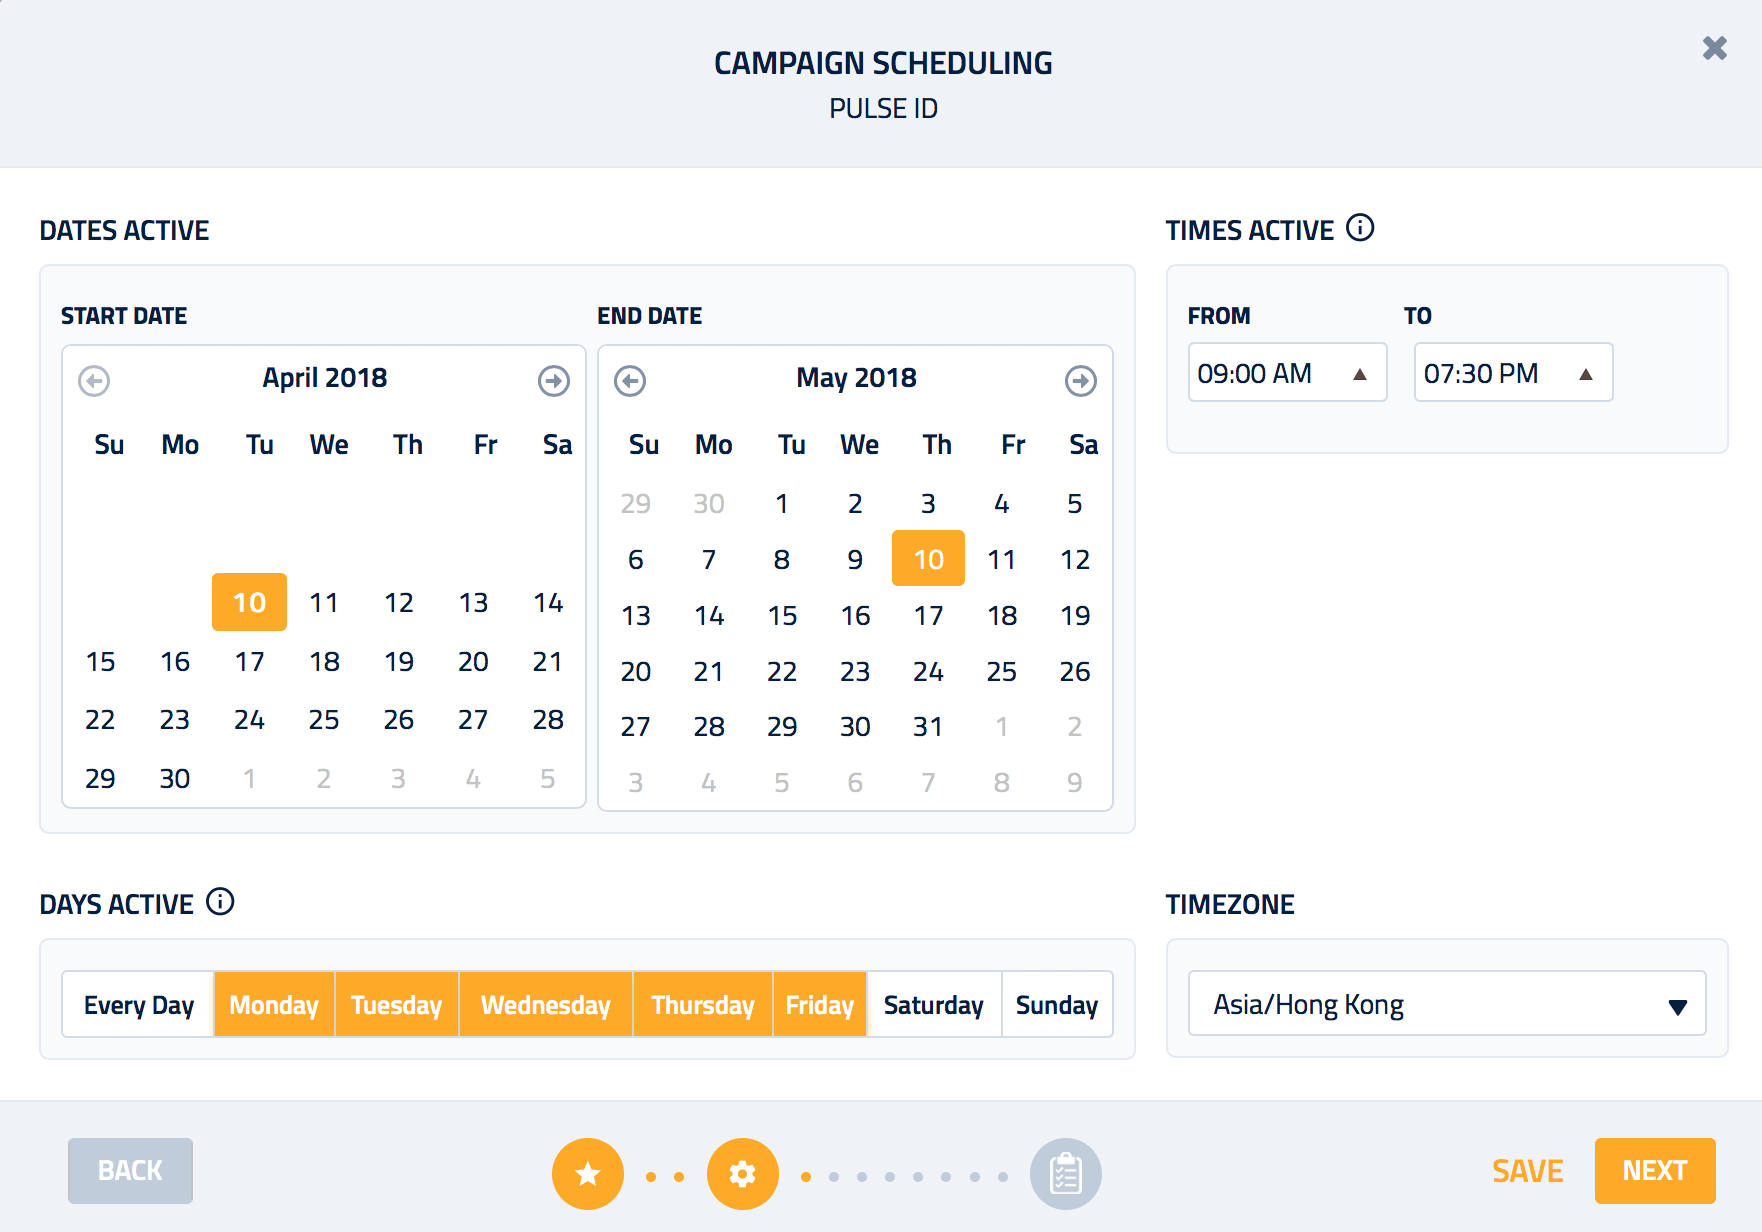
Next, set up the campaign schedule. You can schedule by:
- Date
- Day of the week
- Time of the day
Multiple timezone targeting
For campaigns spanning multiple timezones, set up one campaign per timezone for accurate time-axis targeting.
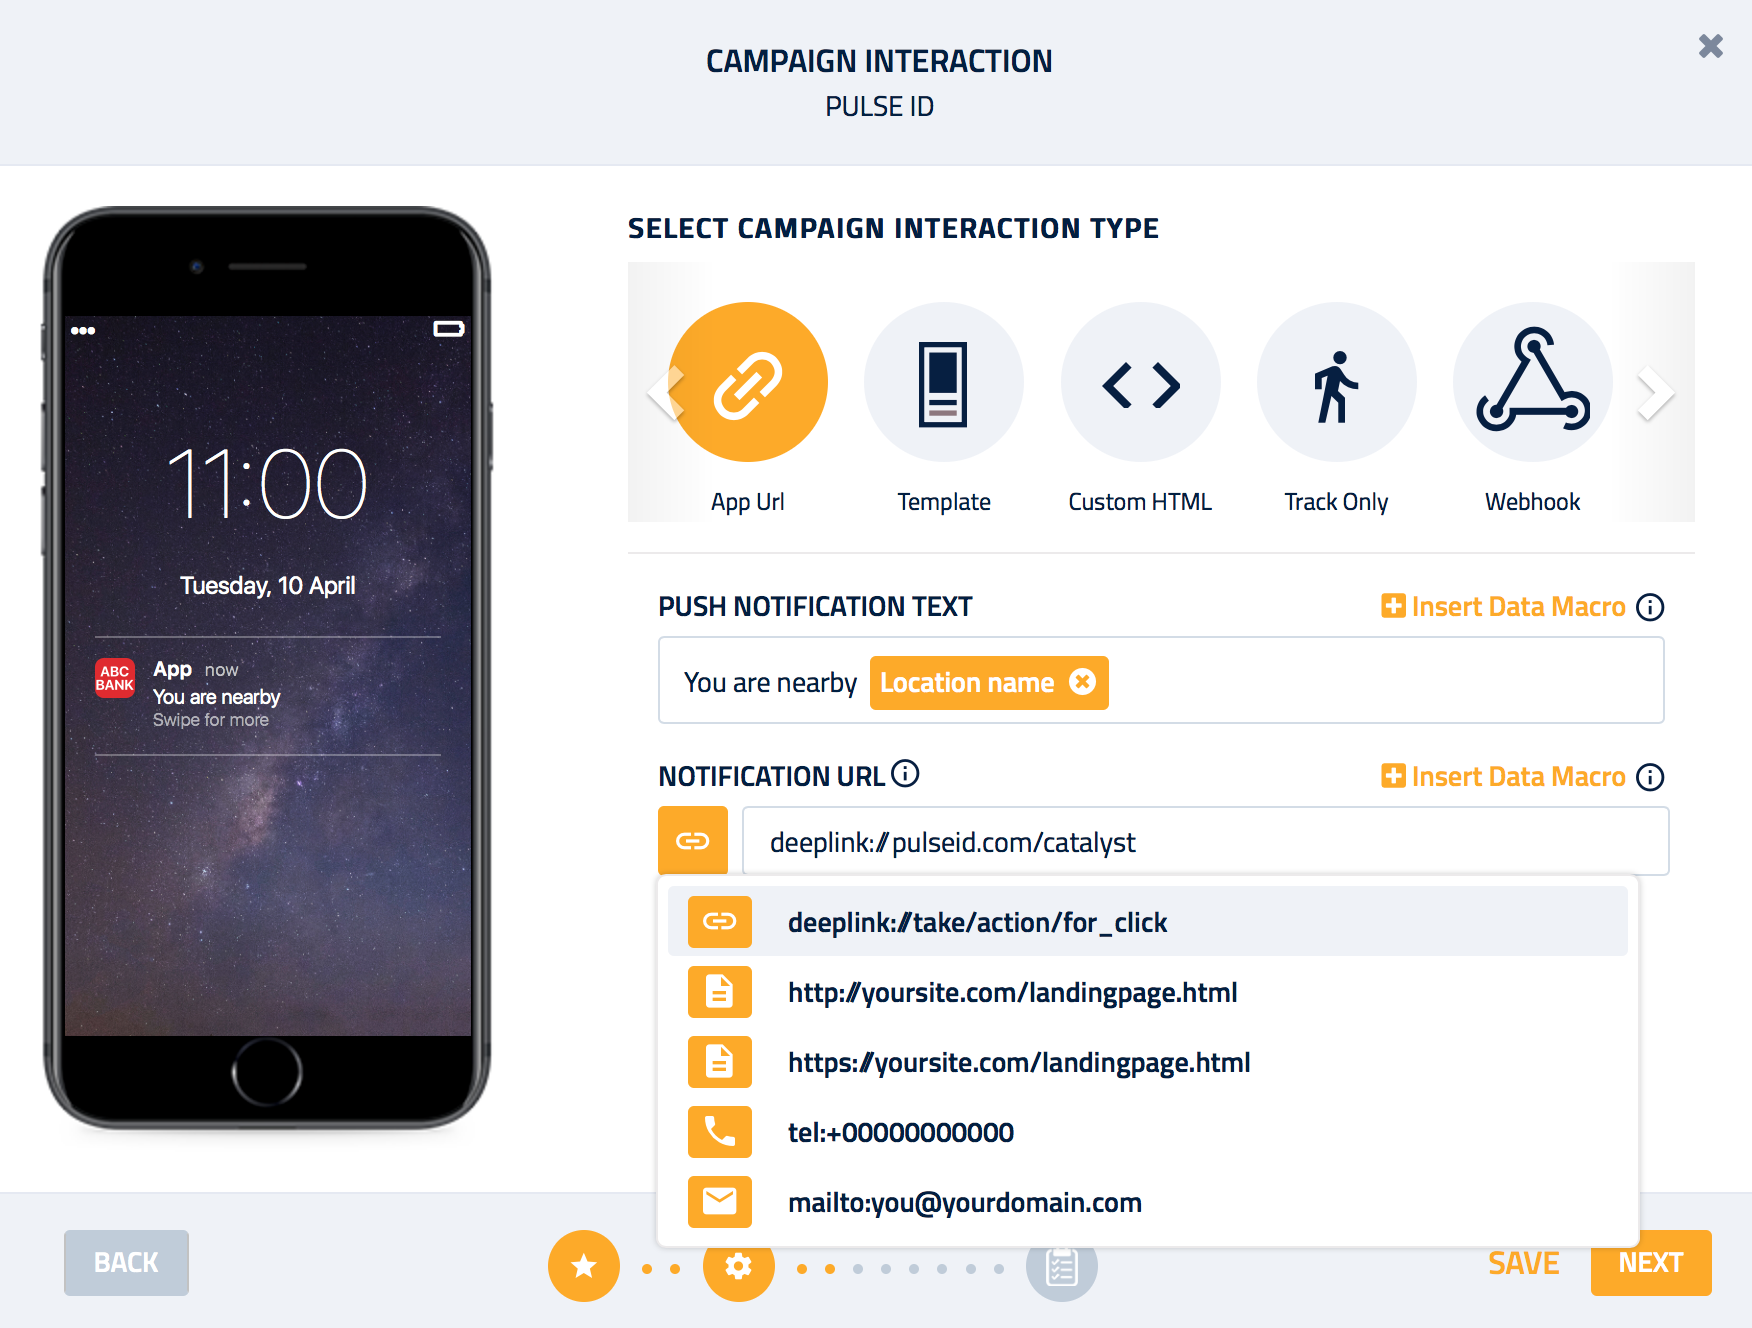
Campaign interaction
A Campaign can be used to engage users in multiple ways:
- When app is closed, user is engaged with a notification. The desired content is displayed to the user when they open the notification.
- This can be setup as a:
- You can also choose to do a passive interaction (i.e. no content is displayed to the user) for analytics purposes:
- Additionally, you can send campaign data straight through to your own CRM for monitoring
Data Macros
Use the Insert Data Macro option to personalise a single Campaign to hundreds of locations and beacons.
App URL
This is the preferred option to perform a deeper integration with the app using deep-linking:
-
You can use it to pass custom data from Catalyst to your app via the SDK and then use it in custom workflows managed by your app
-
App URL can also perform pre-defined actions like opening a URL (in browser) or dialing a phone number
Custom Template
For enterprise clients, custom templates can be created and made available in Catalyst.
-
The template allows pre-defined HTML layouts to be used for the Campaign
-
Pre-defined fields can be edited to customize the content of the template, whilst maintaining overall look and feel
Custom HTML
This option can be used to display mobile optimised HTML content that is rendered within an in-app (fullscreen) web view
-
You can use it to show any mobile
HTMLcontent -
It can also be used to load the content directly from your CMS (using
<iframe>)
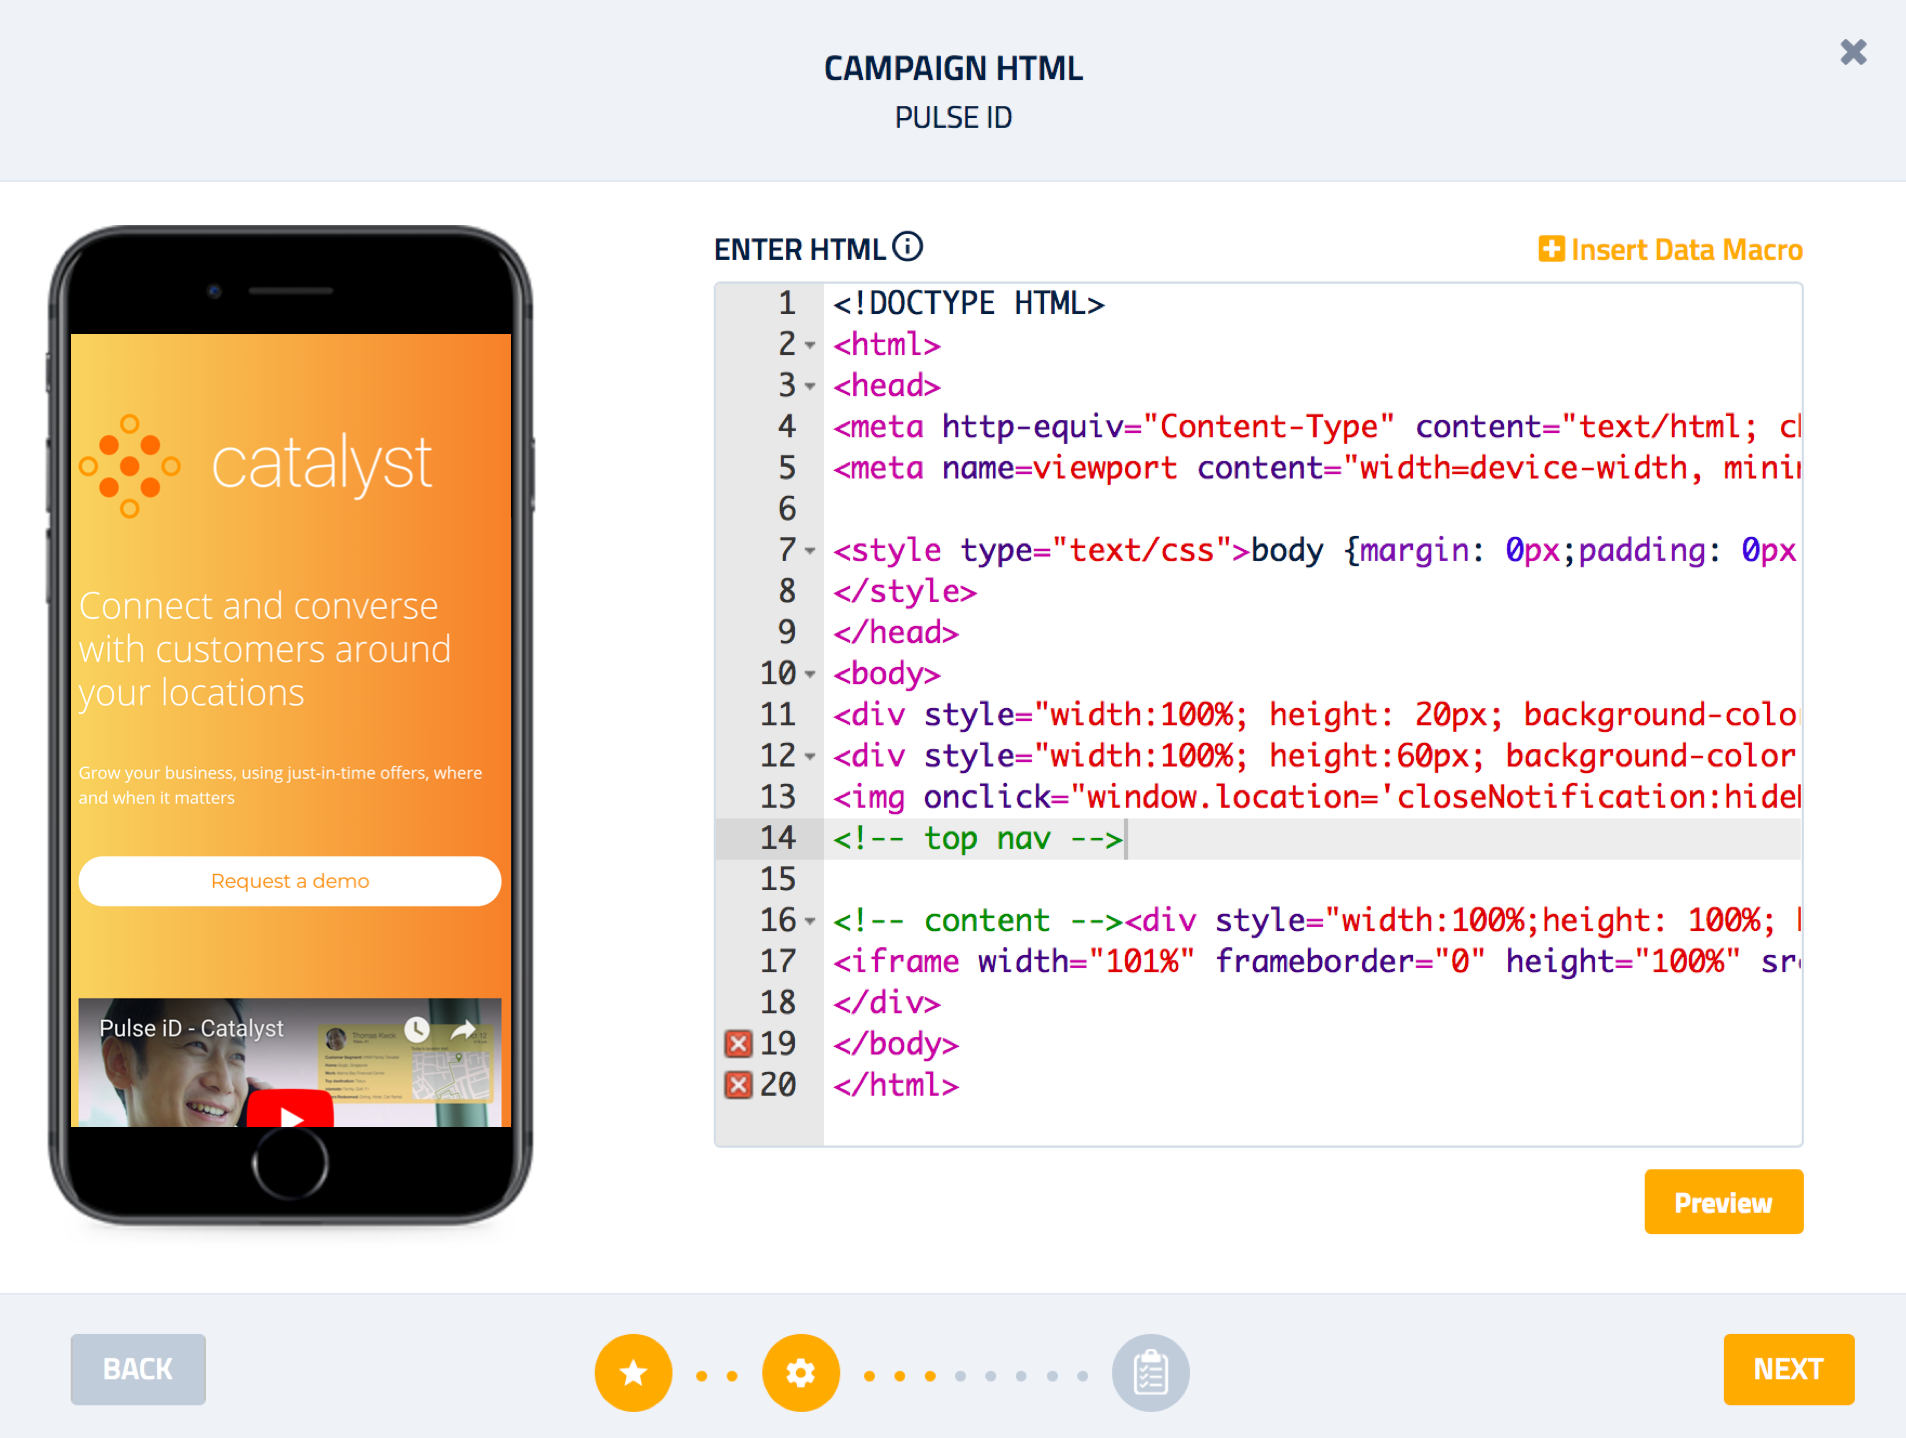
iOS Web View
For custom HTML interactions, note that Cookies are not supported inside iOS Webview. Additionally, all static assets like javascript and image fields need to be accessible over HTTPS.
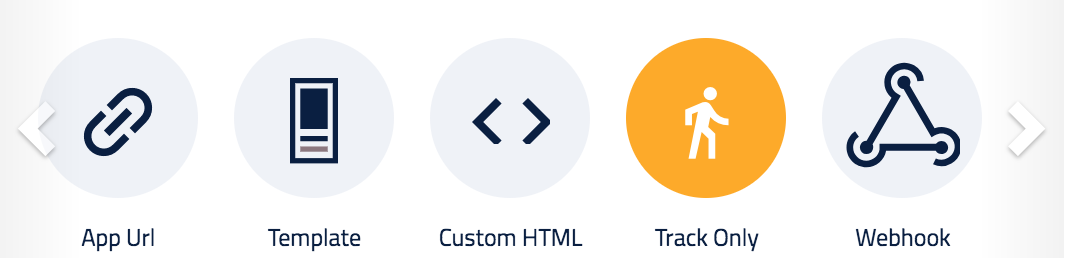
Track Only
No notification or content is displayed to the user. Track Only campaigns do not affect the campaign served quotas for a user, so you can run active and passive campaigns in parallel.
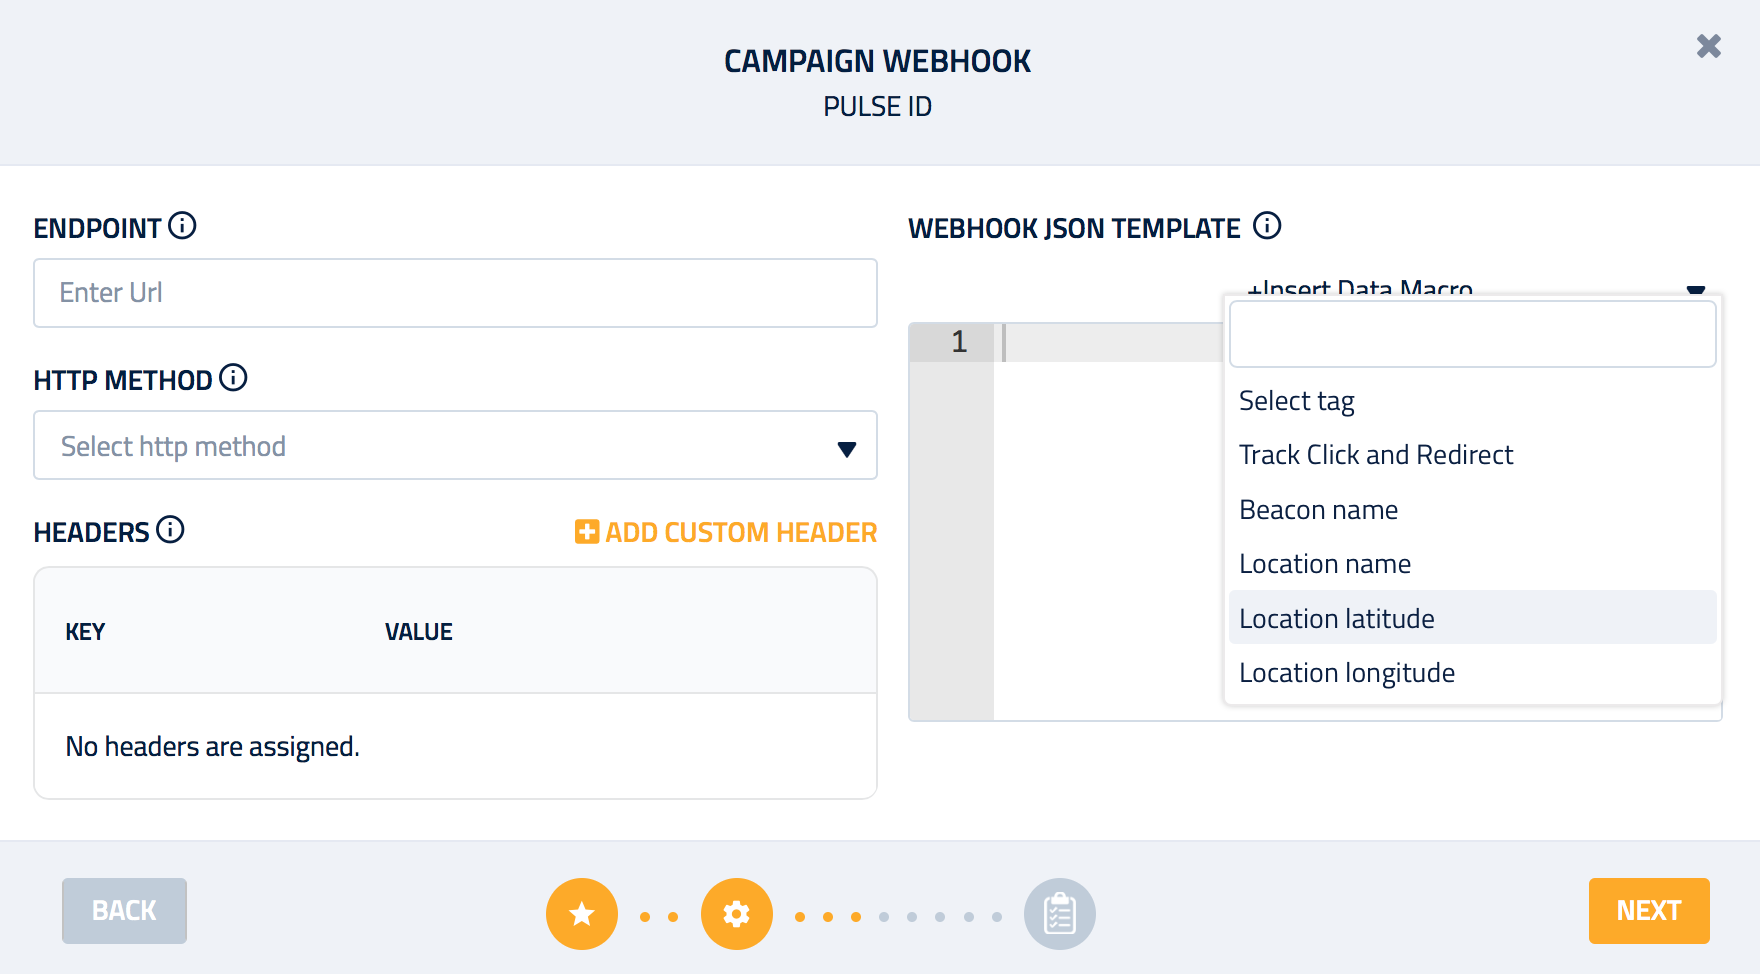
Webhook
Using Webhook, you can transmit the data in real-time from Campaign triggers to a pre-defined web endpoint. The data is always sent as JSON.
We recommend using Data Macros to populate contextual information. For example, the Name of the location where a user just entered or exited.
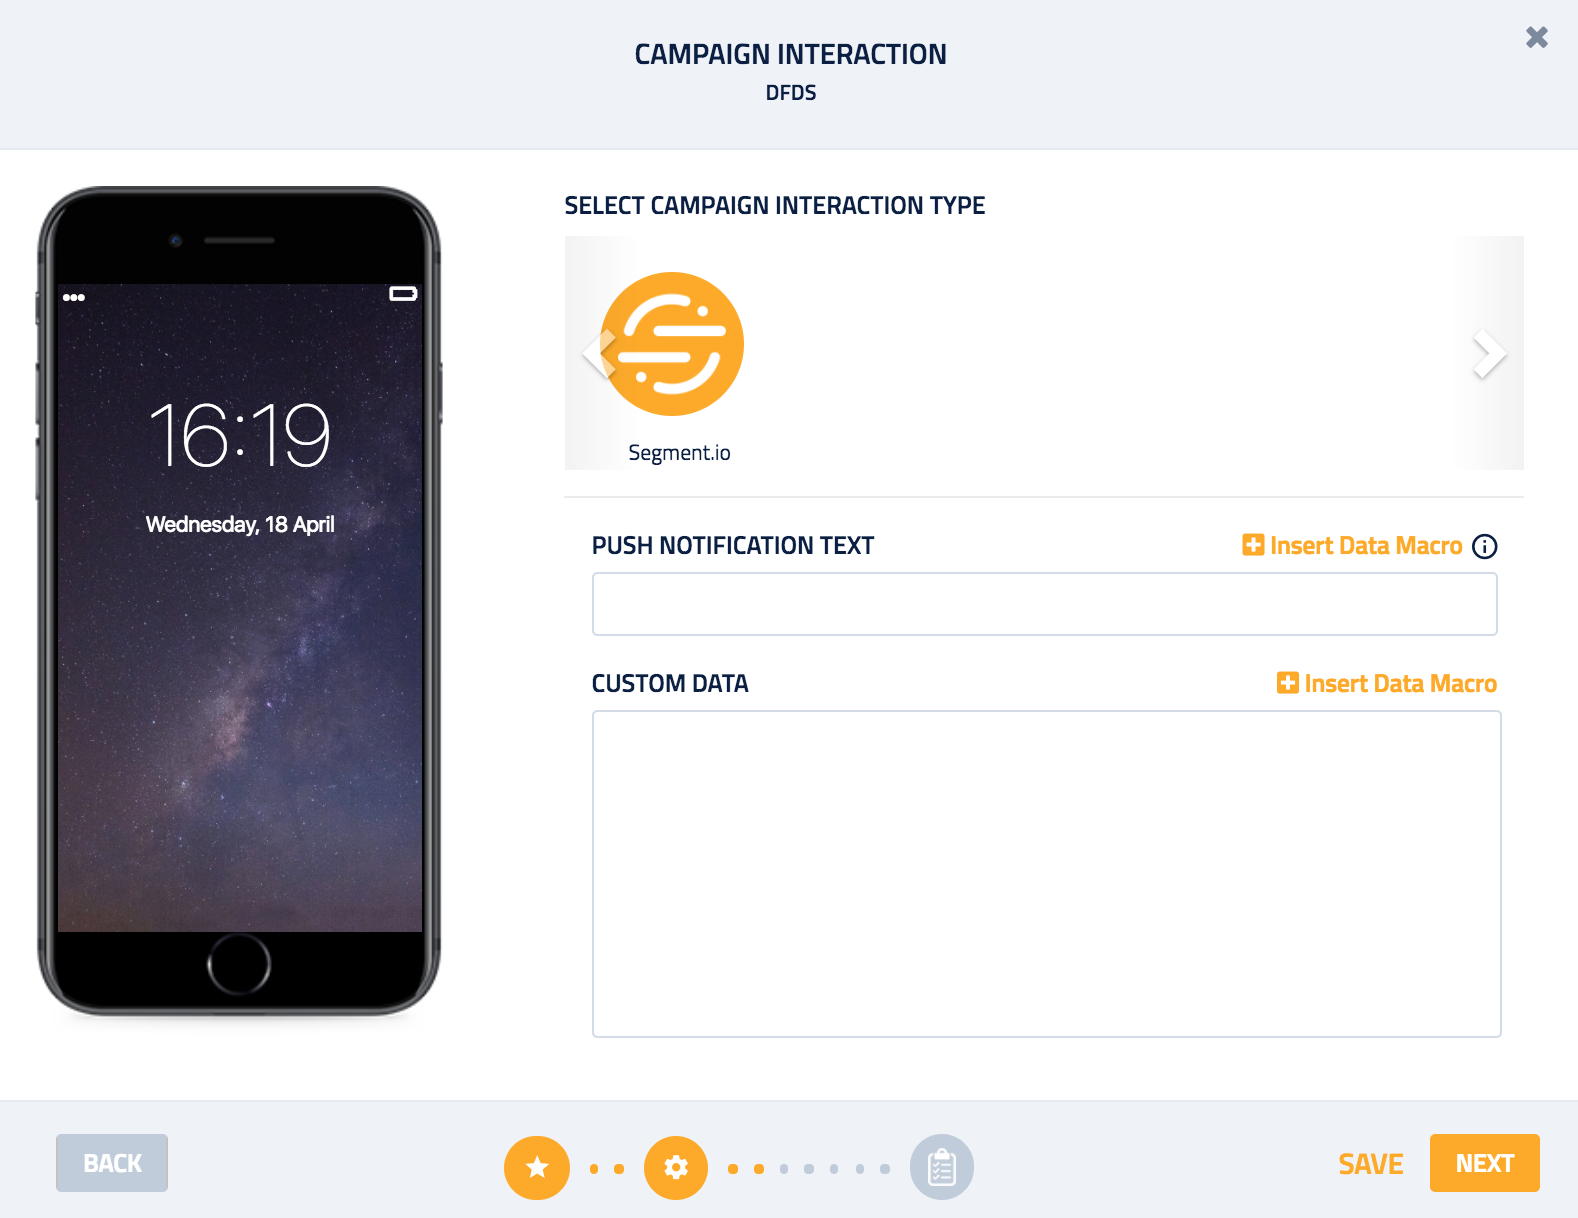
Segment.io
Send campaign data through to your CRM or data warehouse by selecting Segment.io as the campaign interaction. Segment.io allows you to capture four events:
- First time the Pulse SDK is activated on a user's phone
- Geofence entries
- Geofence exits
- Unique user session IDs
More information on Segment.io can be found on the Add-ons section of the Catalyst user guide.
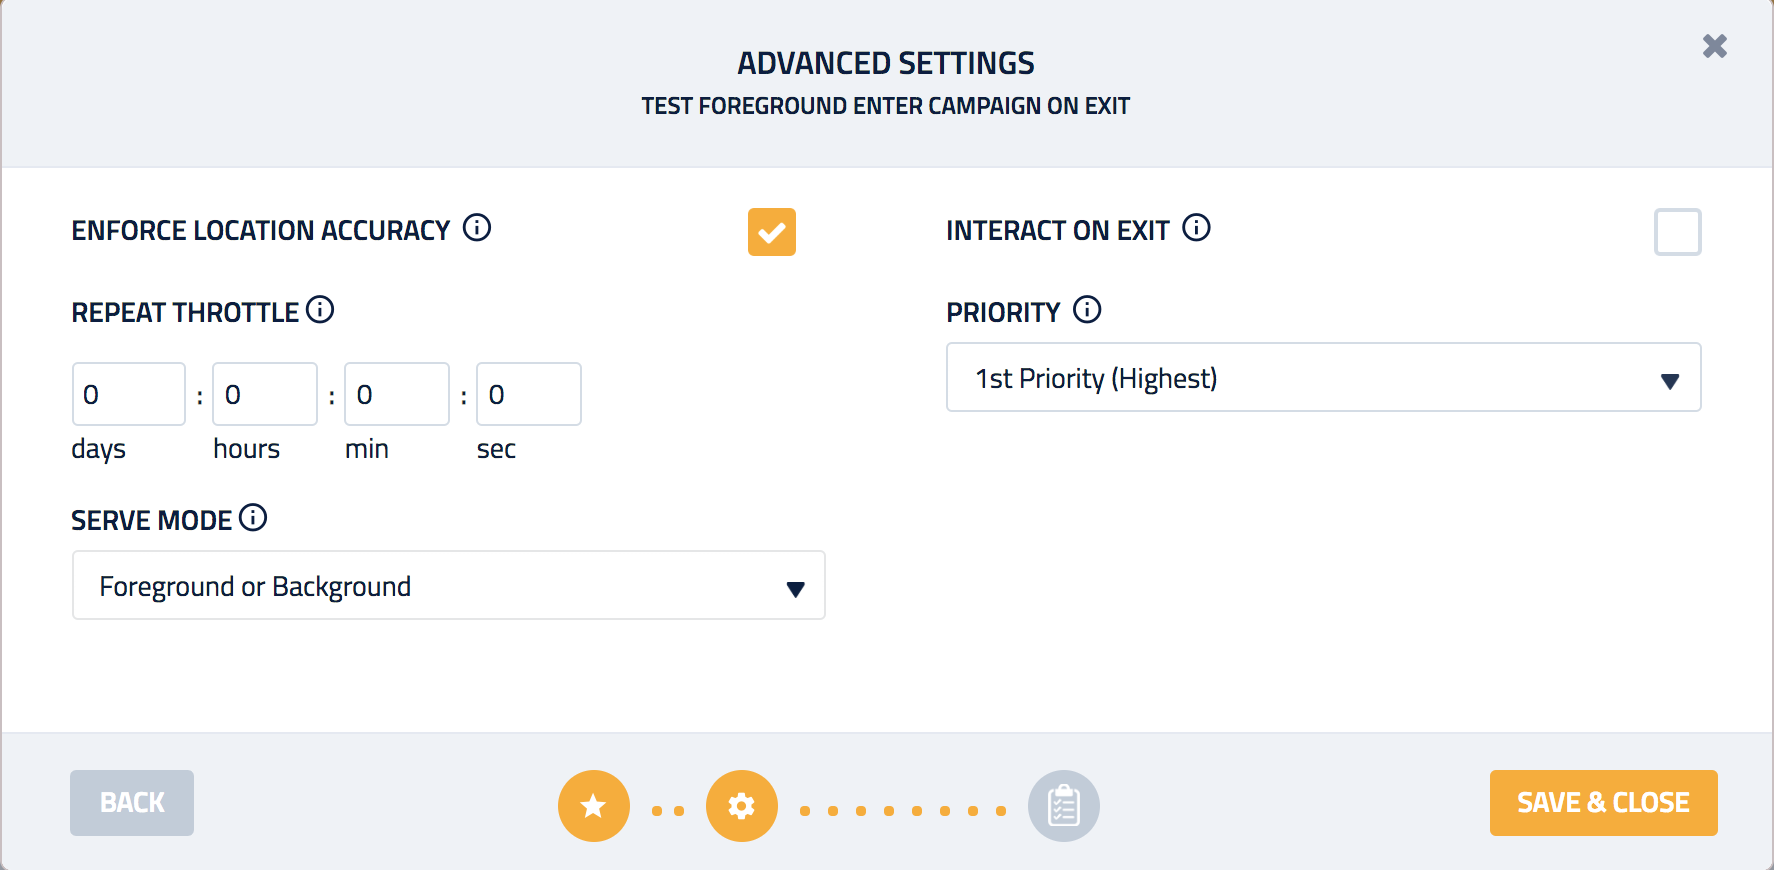
Additional Settings
| Setting | Description |
|---|---|
| Interact on Exit | activates the interaction when a user leaves a beacon or location |
| Enforce Location Accuracy | activates a Pulse algorithm that validates the accuracy reported from the device to determine if user is within a Geofence before triggering the Campaign |
| Repeat Throttle | is used to prevent the Campaign from sending repeat notifications to a user during a specified time |
| Priority | can be set to give a Campaign priority over other Campaigns that meet the same targeting criterion |
| Serve Mode | campaign will be served only when app is in the selected mode |
Serve Mode
Serving deeplink campaign in the foreground mode results in click event registration for the interaction when the campaign is served to the app which is in foreground/active mode.
Beacon targeting
Next, add Beacons to a Campaign if you are using them for targeting. We recommend using Tags to quickly add Beacons to your campaign.
-
Select a tag and all associated Beacons will become available:
- Select the App you want to target
- Click +Beacon to add a single Beacon, or multiple Beacons you have selected
- Click +All Beacons to add Beacons within a tag
-
Once the Beacons have been added:
- Use the search feature to look for a specific Beacon
- Delete one or more Beacons
Share beacons between apps
You can target one beacon across multiple Apps from a single Campaign.
![]()
Geofence targeting
Adding Geofences is very similar to adding Beacons. We recommend using Tags to quickly add Geofences to your campaign.
- Select a tag and all associated Locations will become available:
- Select the Location you want to target
- Select the App you want to target
- Enter the Radius for your Geofence
- Click +Geofence to add a single Location, or multiple Locations you have selected
- Click +All Geofences to add all tagged Locations
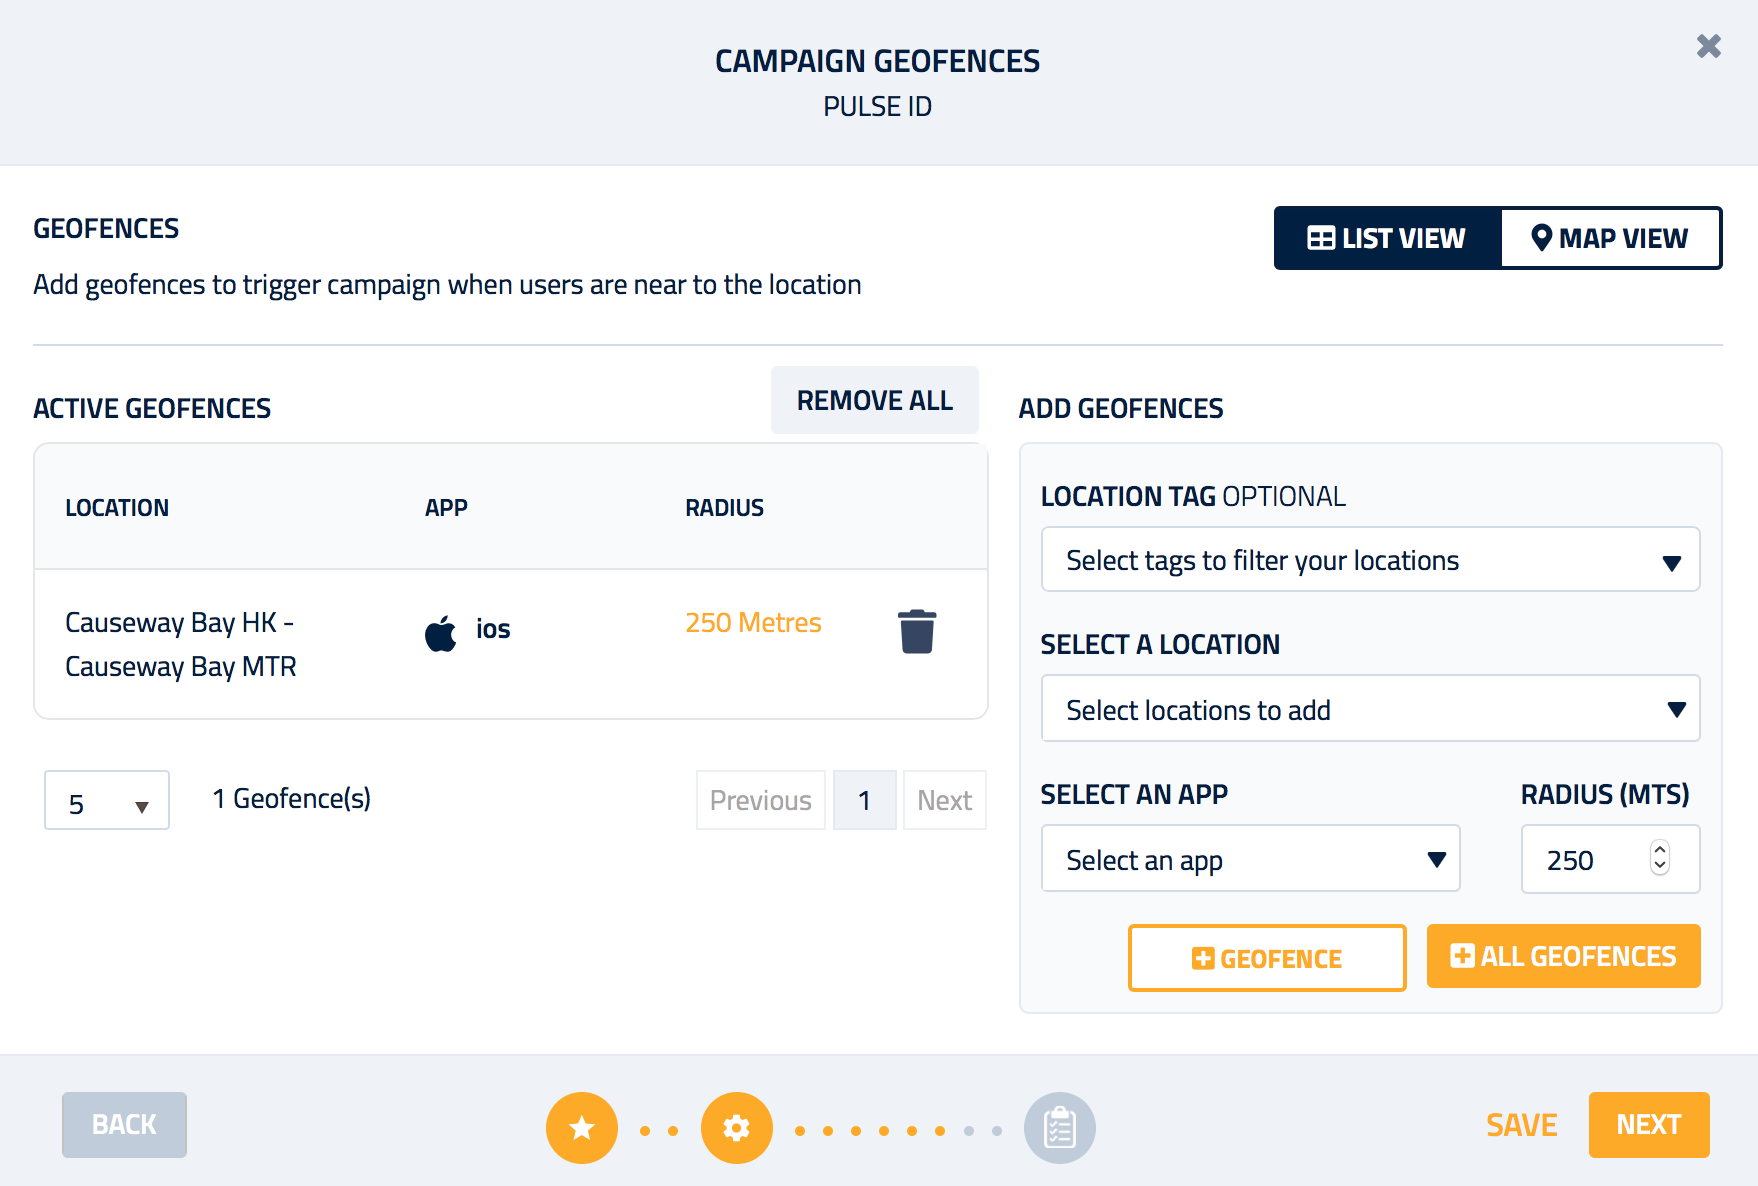
Target hundreds of locations
You can activate hundreds of Geofences across multiple Apps from a single Campaign
- Once the Geofences have been added:
- Use the search feature to look for a specific location
- Delete one or more Geofences
- View a single Geofence on the map by clicking the
Radiusof the geofence - View all Geofences on the map by clicking the
Map Viewbutton - Update or remove a Geofence from the map

Real-time geofence updates
All Campaign changes are published in real-time when you save the Campaign. Depending upon your App configuration it may take a few hours for Geofences to be downloaded to user devices.
Audience
Finally, you can narrow down the targeting to specific audiences using Segments :
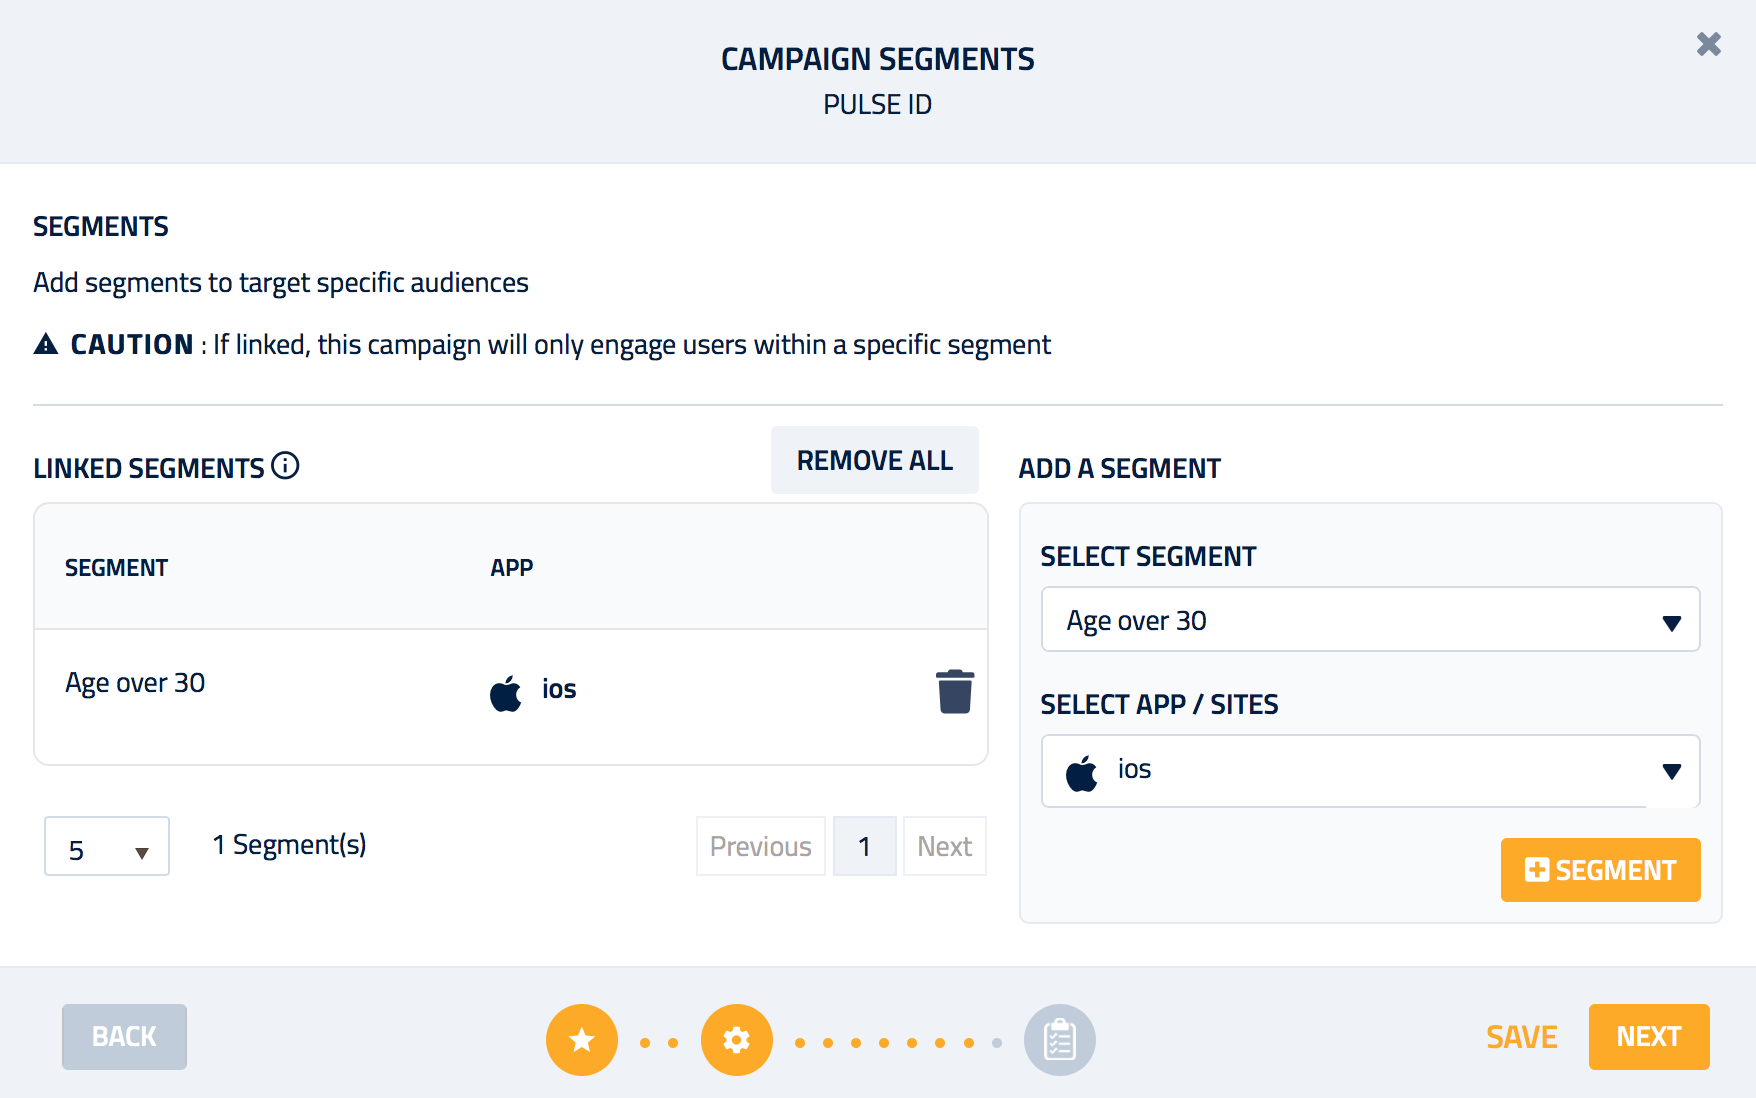
Danger
Campaign information can not be recovered if the Campaign was deleted.