Web Campaigns
Setting up a Web Campaign is similar to setting up an App Campaign. Web Campaigns are delivered based on the location of the user as they are browsing on your website.
Click the add Create Campaign button in the top-right corner to set up a new Campaign.
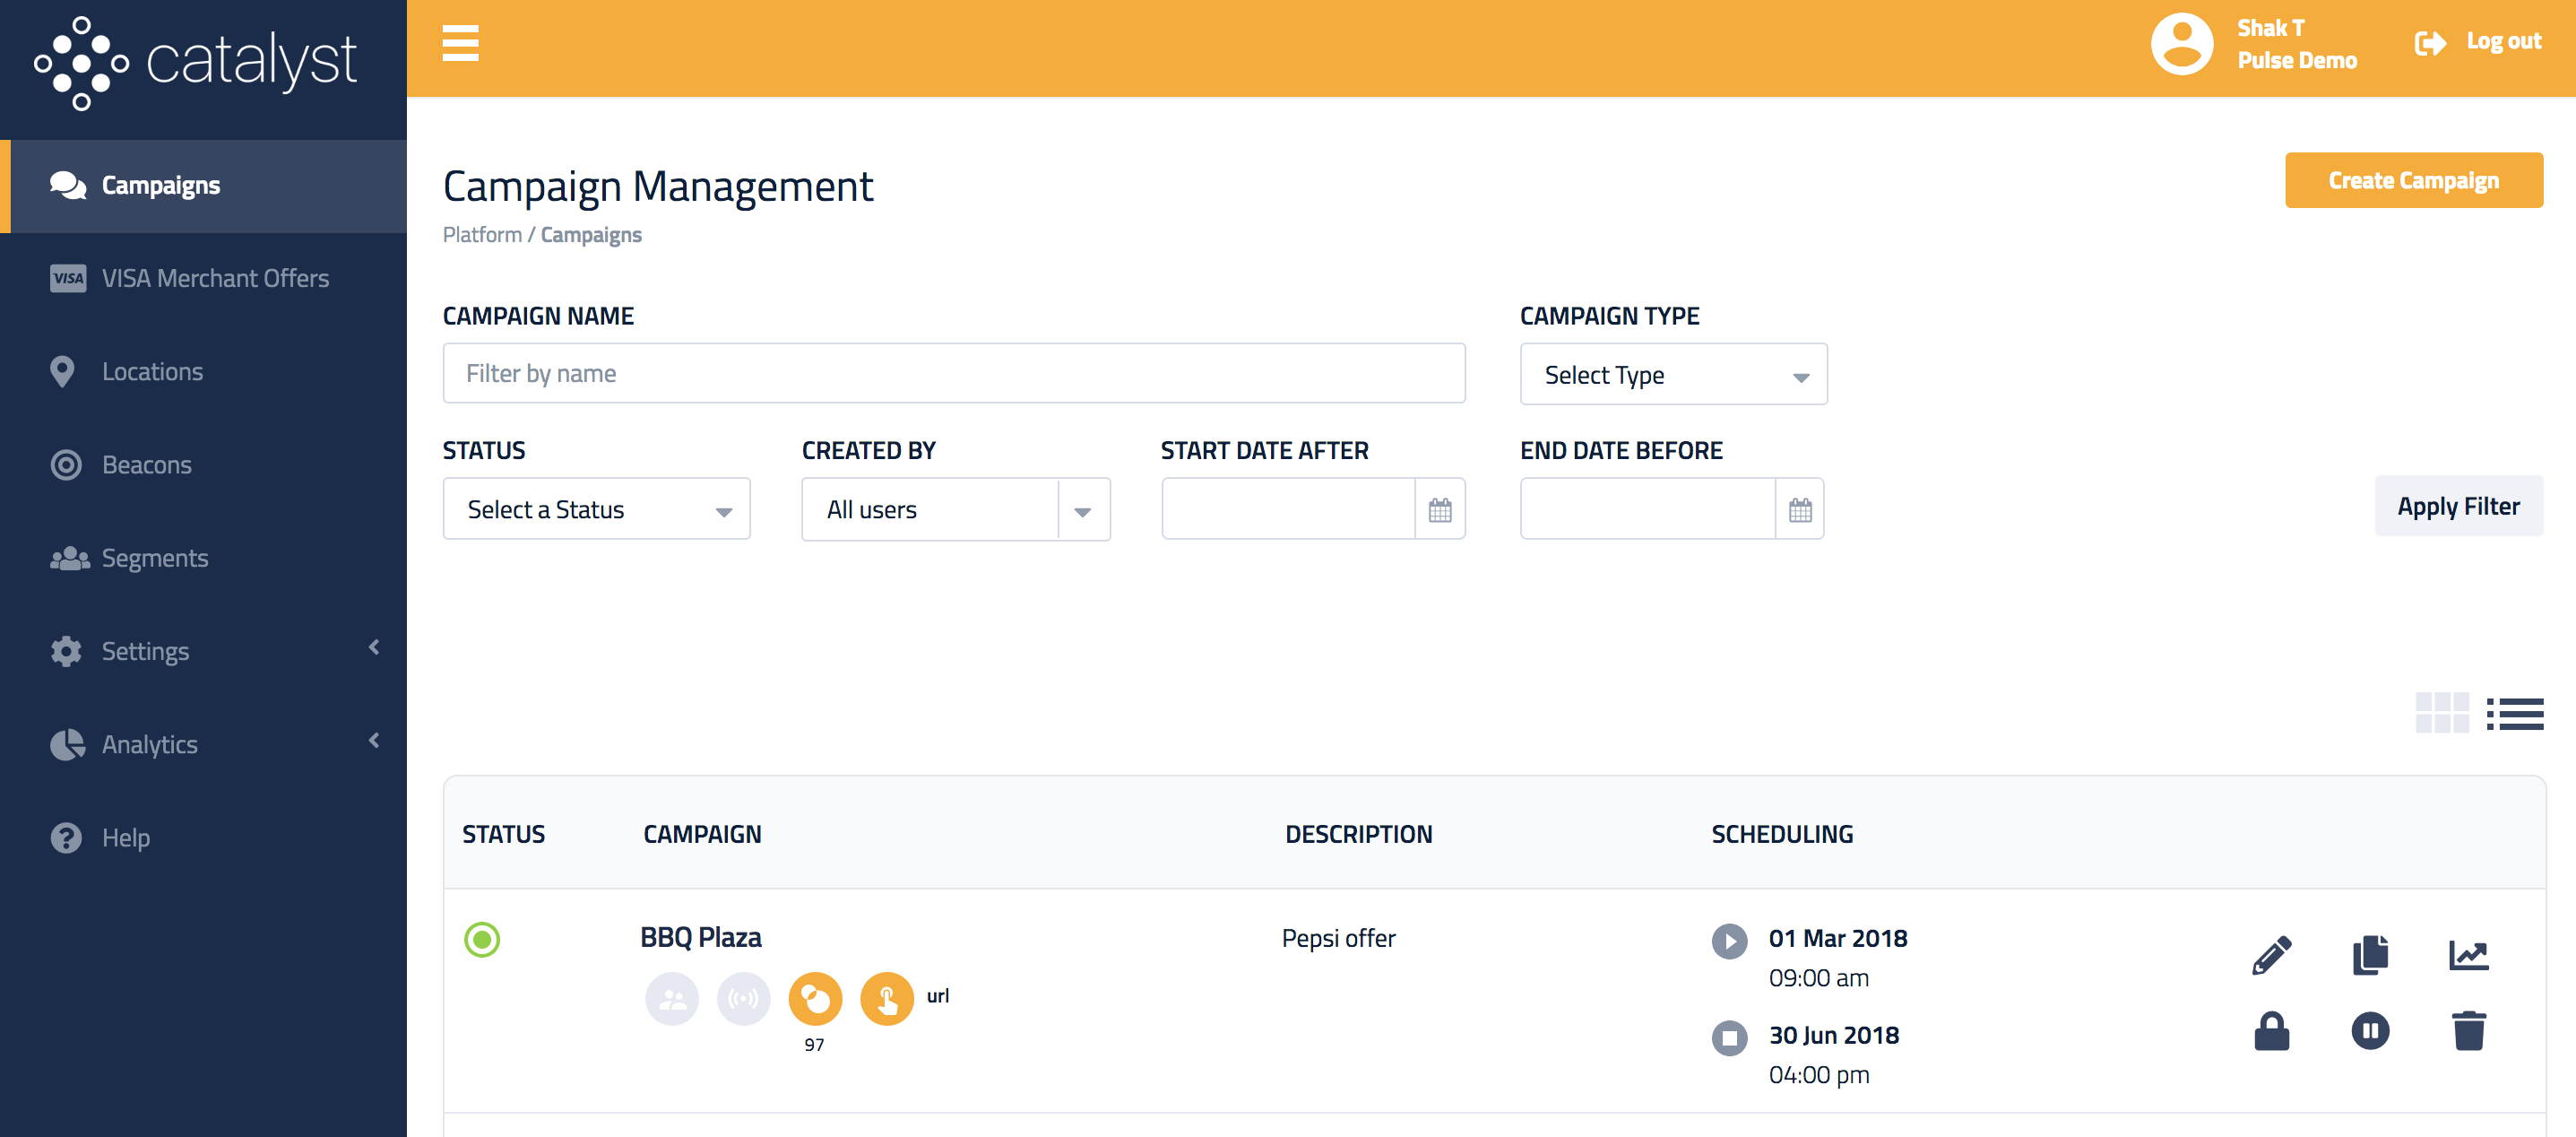
| Operation | Description |
|---|---|
 |
Starts the Campaign wizard to edit the Campaign |
 |
Duplicates an existing Campaign. This is a handy tool for quickly starting new campaigns based on previous configurations |
 |
Displays Analytics for the current Campaign |
 |
Locks the Campaign to prevent accidental modification |
 |
Pauses the Campaign, preventing it from being delivered |
 |
Deletes the Campaign |
Campaign type
Enter basic information to identify your Campaign and select Web Campaign to proceed.
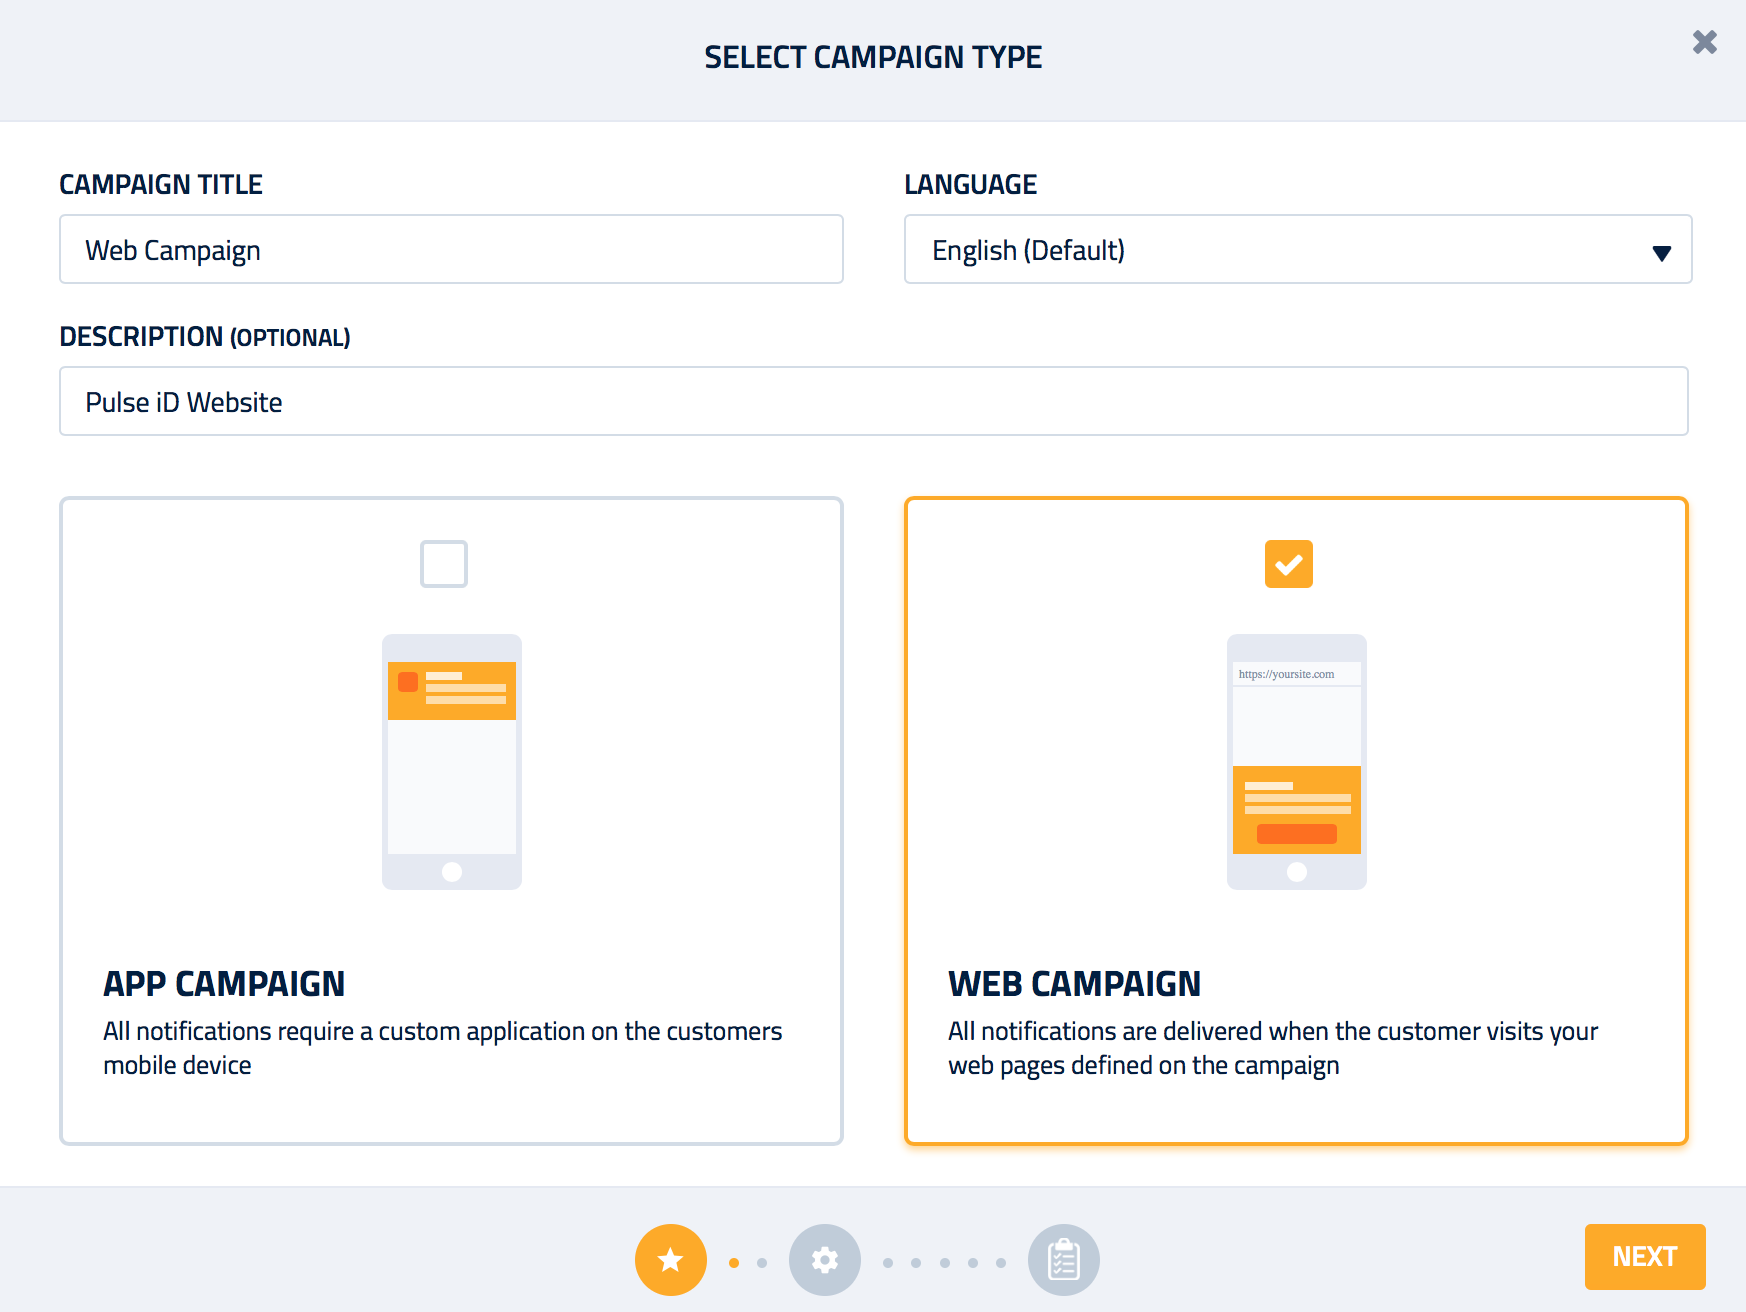
Language preference
English is the default Language. However, if another language is chosen then the native language campaign will be given priority when a user device has the same preferred language.
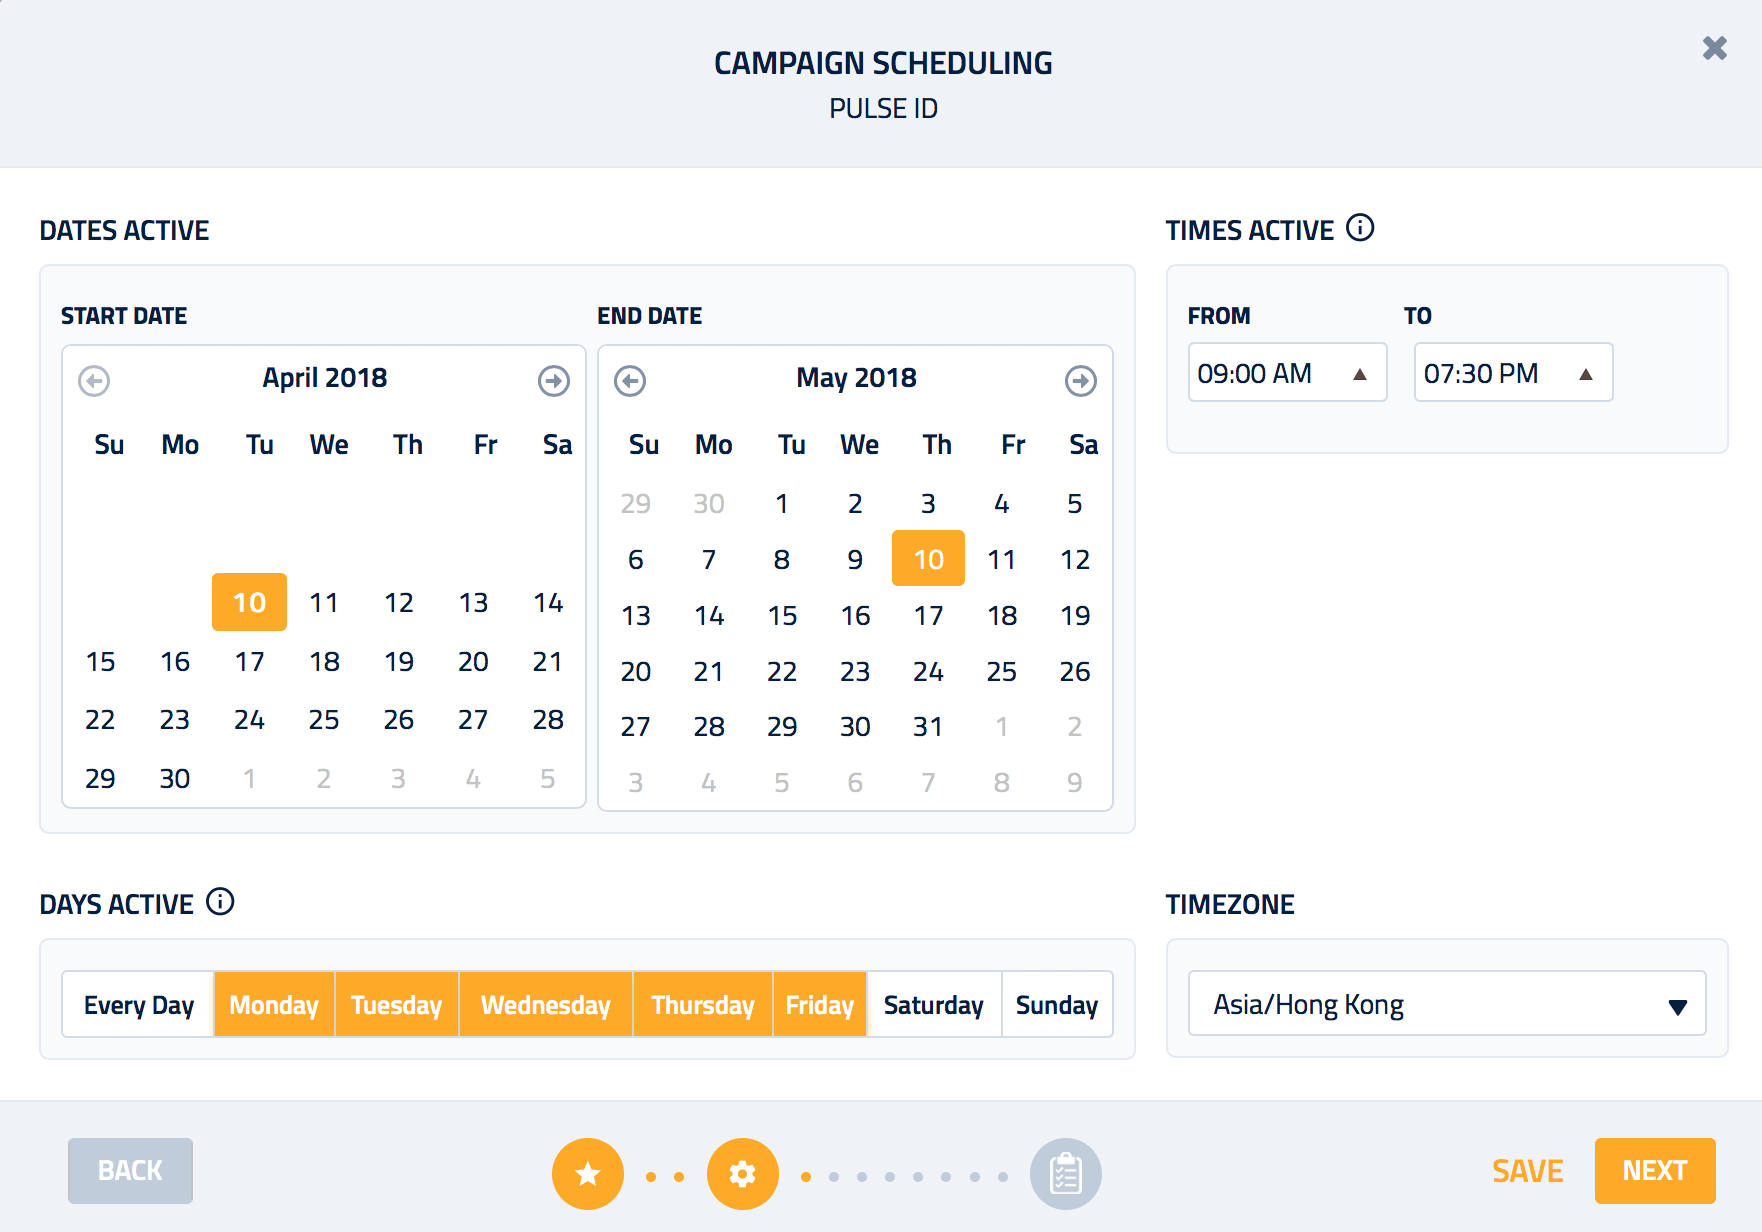
Time-axis targeting
Next, set up the campaign schedule. You can schedule by:
- Date
- Day of the week
- Time of the day
User interaction
The Campaign can be used to engage users in multiple ways:
- Geo-tile : The content can be delivered as mobile optimised HTML that is shown as a
call-outon the site. This tile can be pinned to the:- Bottom of the site
- Top of the site
- Middle of the site
- User-defined function: The content is also delivered to a callback function on the site for further processing. This is the most flexible option and allows the developer to control the user interface and experience that he/she wants to create.
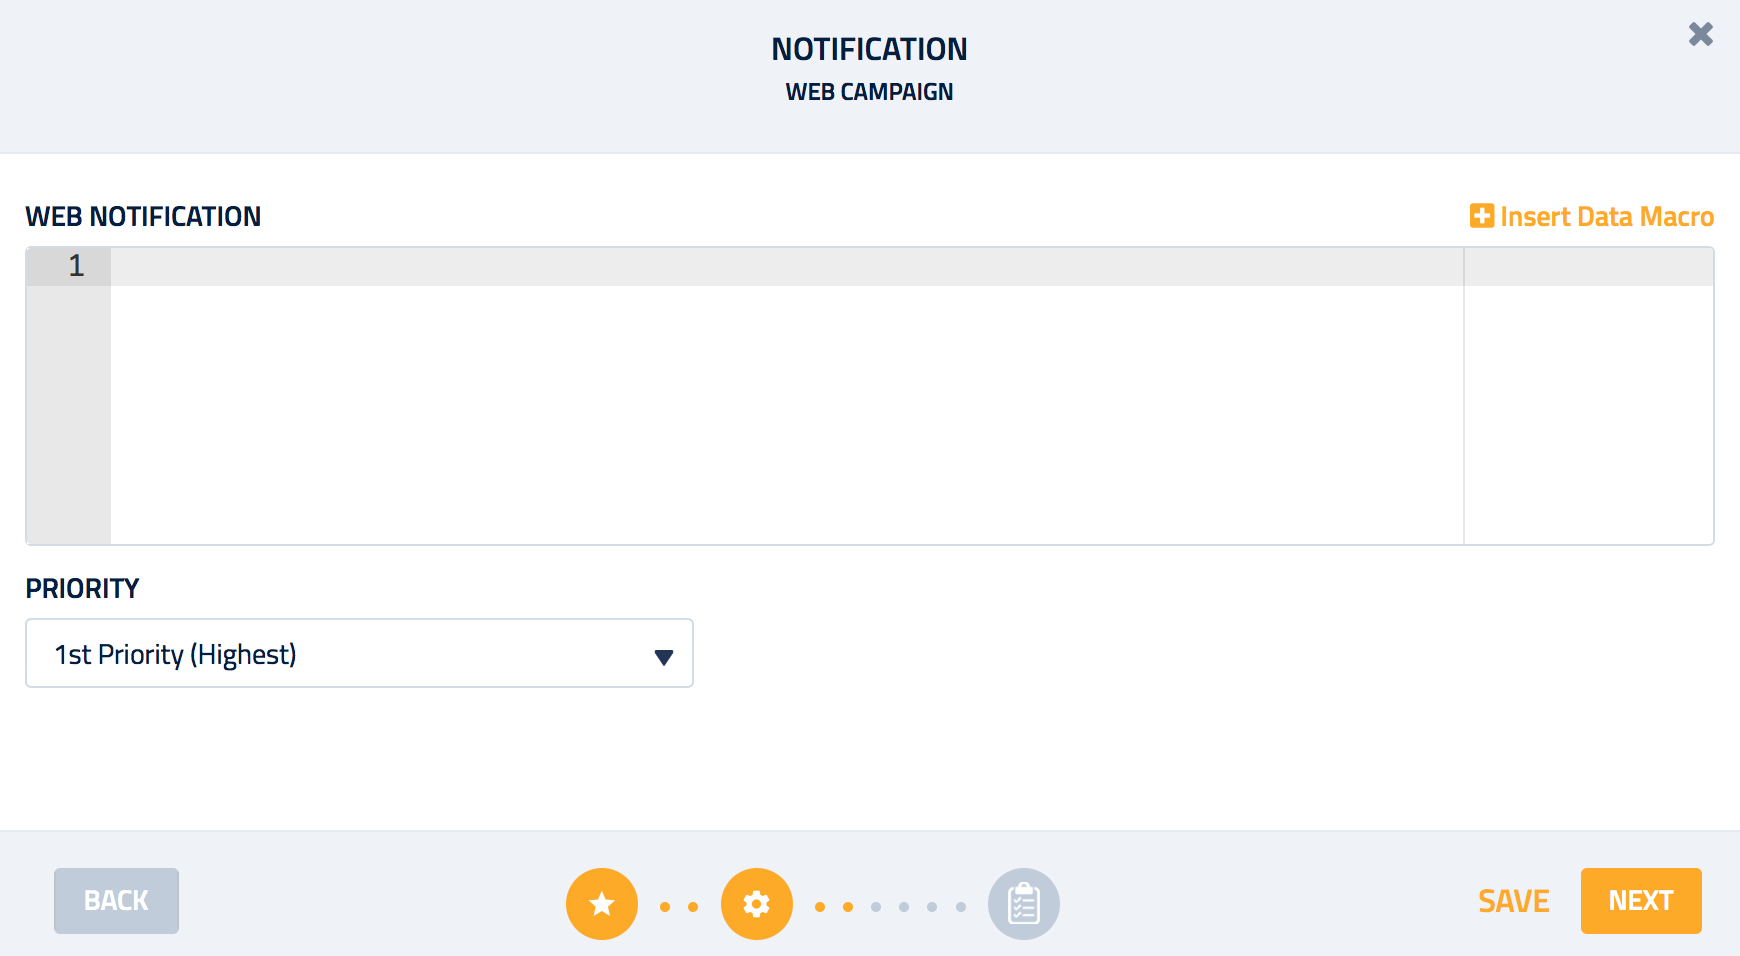
The Campaign can also be assigned a Priority to determine which Campaign is given Priority when multiple suitable Campaigns are found.
Optimal Engagement
Please contact Pulse support to advise on SDK configuration for desired user experience and design of Geo-tiles for optimal engagement.
Website Targeting
Next, select the Site and Pages where this Campaign will be delivered.

Multiple Sites/Pages
Note that you can deliver the same Campaign to multiple Sites and specific pages.
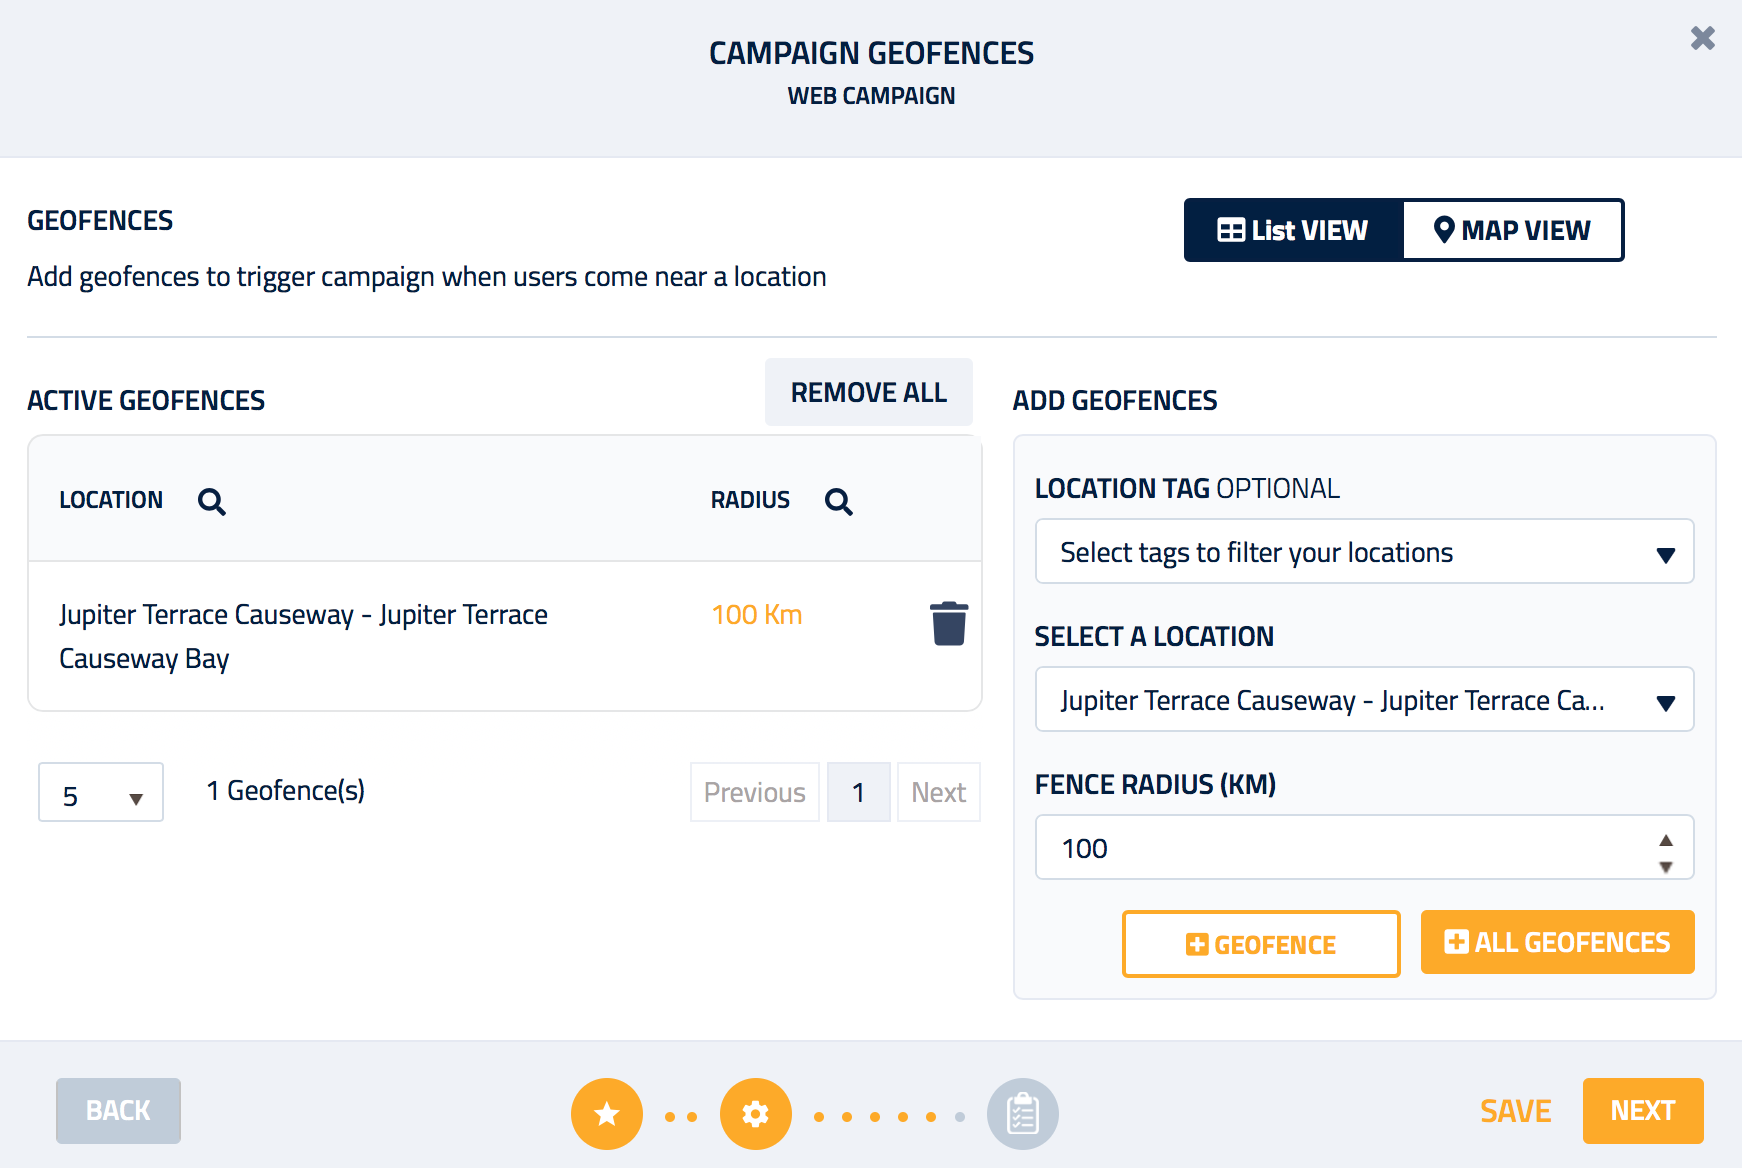
Geofence targeting
We recommend using Tags to quickly add Geofences to your campaign.
- Select the tag and all associated Locations will become available:
- Select the Location you want to target
- Select the Website you want to target
- Enter the Radius for your Geofence
- Click +Geofence to add a single Location, or multiple Locations you have selected
- Click +All Geofences to add all tagged Locations
Target hundreds of locations
You can activate hundreds of Geofences across multiple Apps from a single Campaign
- Once the Geofences have been added:
- Use the search feature to look for a specific location
- Delete one or more Geofences
- View a single Geofence on the map by clicking the
Radiusof the geofence - View all Geofences on the map by clicking the
Map Viewbutton - Update or remove a Geofence from the map
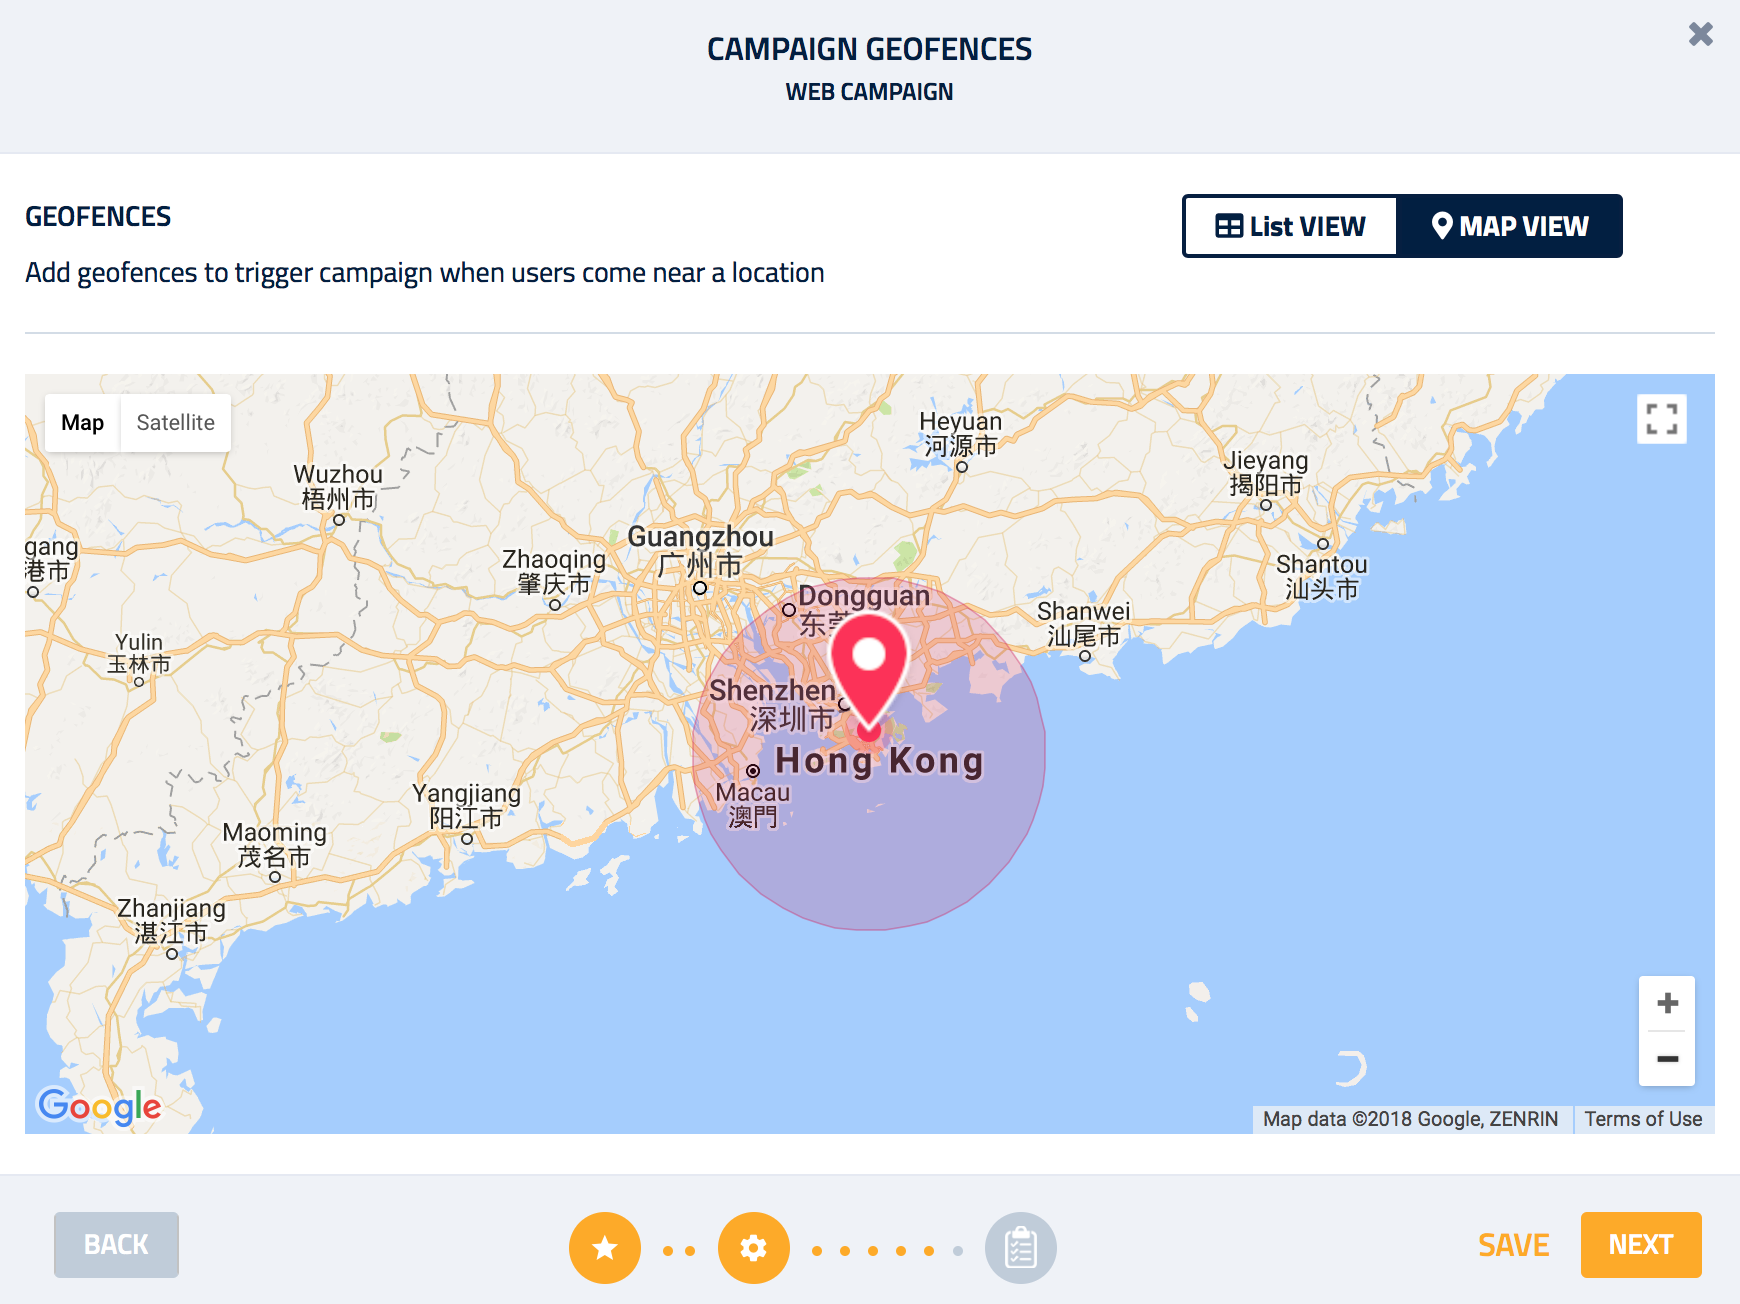
Real-time geofence updates
All Campaign changes are published in real-time when you save the Campaign.
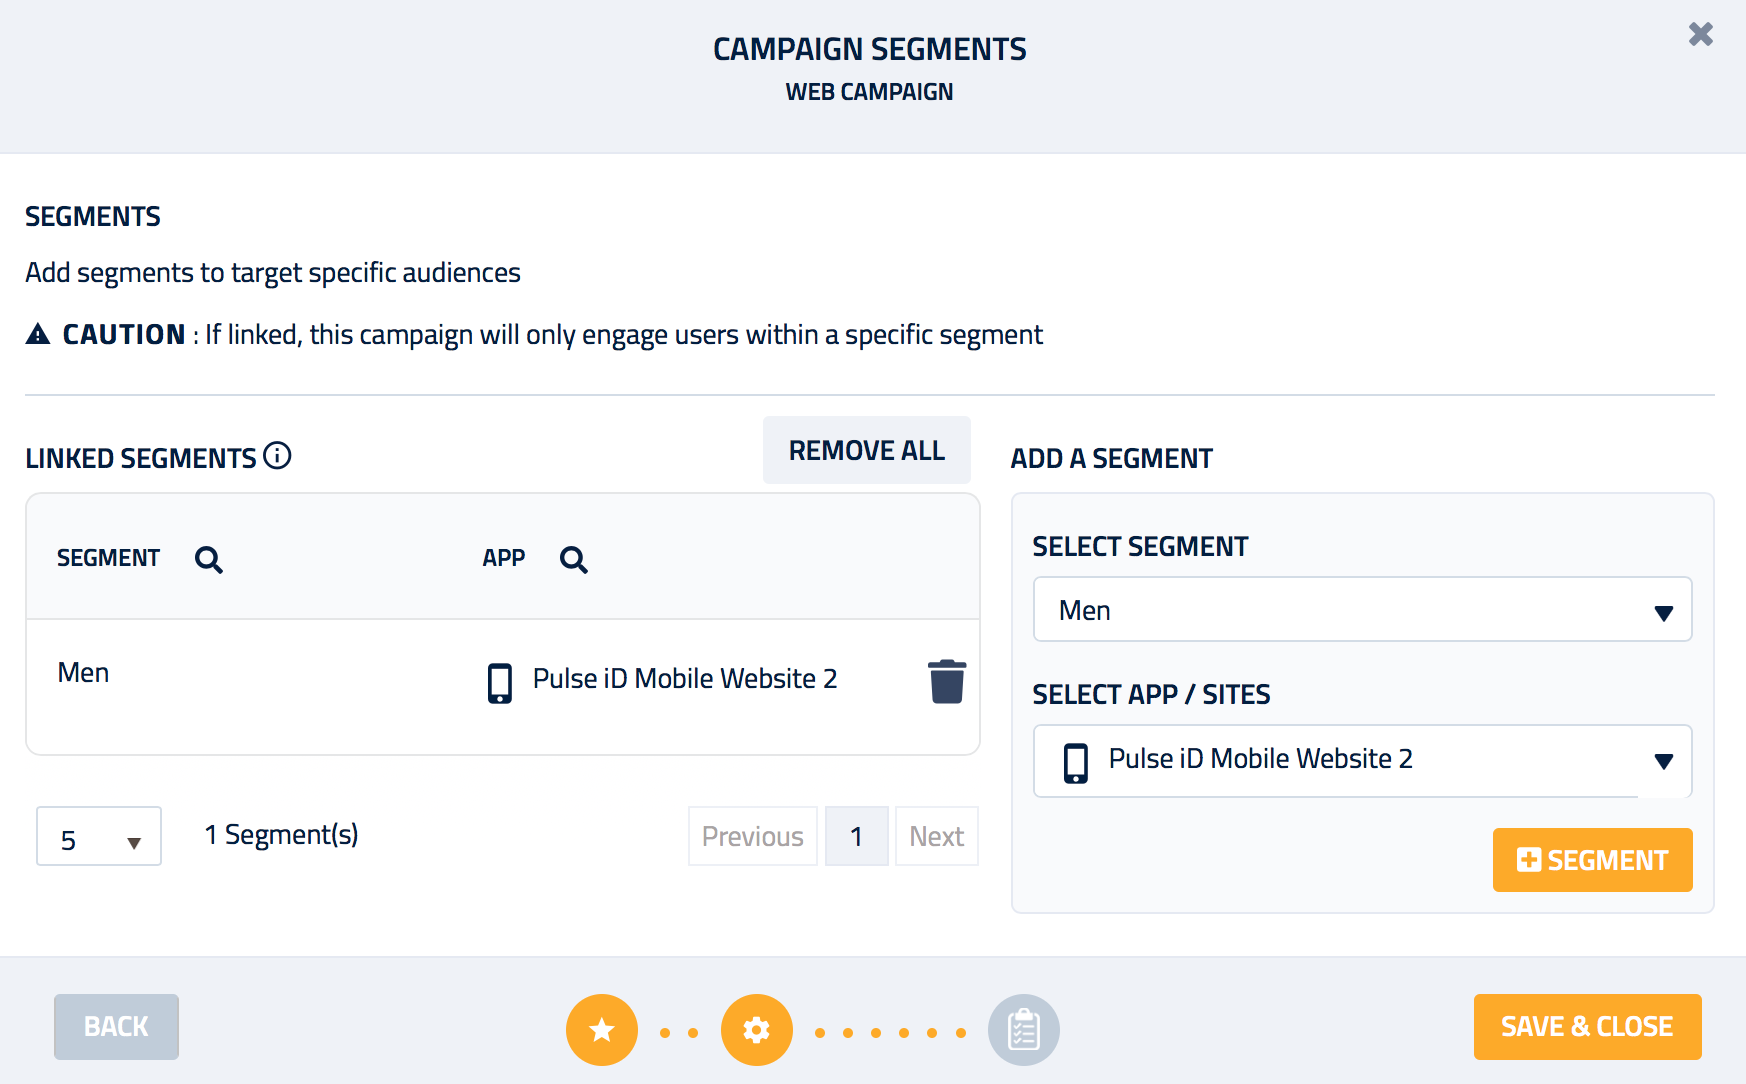
Audience
Finally, you can narrow down targeting to specific audiences using Segments :
Danger
Campaign information can not be recovered if the Campaign was deleted.